My definition statement is “The aim of my project is to design a RC plane that has wings optimized to limit both noise, while increasing speed. The design would have more of a military aspect.” I am trying to solve the problem of high speed aircraft being limited to certain airspaces. If the problem would be solved, travel time would decrease severely world wide. This problem is something every airline is trying to solve and even some militaries.
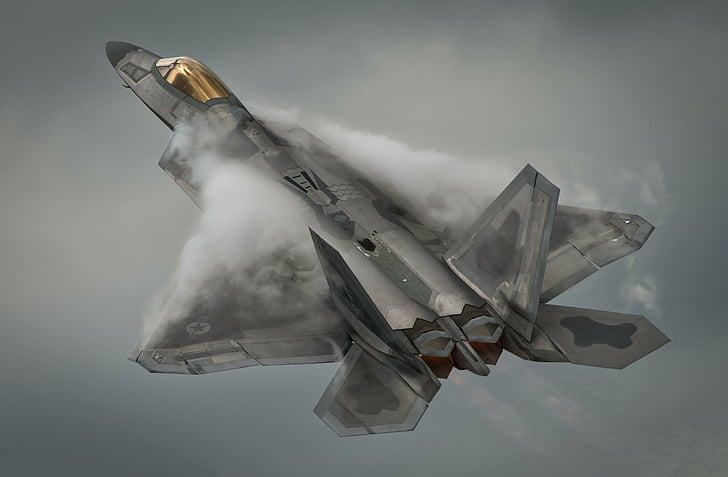
I have started to research certain wing designs and other previous solutions. I have settled on either a Delta wing design or retractable wings. I have watched multiple videos on the aerodynamics of the Concorde and the new XB-1. The evidence I have gathered directly ties into the solution I will need to solve my problem.
My solution has pivoted from a real world design to a Cad design that I will test in an only simulator. My first thought was almost build a bi-plane with a Rc plane so I can test the aerodynamics in-flight. I realized that there was no way for me to gather reliable data or the actual air-flow going over the wings. In a simulator, everything I need will be laid out and I can collect more reliable data. I will test it against my definition statement by also testing a control wing design. This could be something as simple as a straight line or the wing design of the Concorde. If the airflow stays straight and does not arc towards the ground at a severe level, I will consider this a success.
So far, I have started to look into certain wing designs and am in the final stage of selecting a wing design. I have narrowed it down from 10ish to 3 or 4. I am also looking into affordable simulators that I can test my design in. The simulators that I have found so far are either too expensive or don’t give good enough data. I have made a simple Cad design of a Delta shaped wing just to confirm that it will work. I have also looked into real world designs that use the certain wing designs. I am trying to look at speed and the max ceiling of these planes to get a realistic idea of what the wings I will design are actually going to improve.
I for see some challenges involving certain wing designs not working as I would expect. Many brilliant scientists have attempted this challenge in the past with no luck. Making the airflow curve a certain way is going to involve many different prototypes and slight adjustments model to model to make a large difference. This will provide a mental challenge for myself. Making these changes in OnShape is very annoying and time consuming. It will be a challenge for myself because I don’t want to settle for less than perfect. There will also be the challenge of collecting accurate data. I will need to screen record every test so I can compare models side-by-side. This will be a challenge because if I forget to record one test, all of my data is incorrect.
My next step is finalizing my research. I will settle on 1-3 wind designs and start to create them in Onshape. I will also finalize a simulator that I will test my model on. This step is something that I need to focus on because it is laying the groundwork for my final test.
I am planning on using AI to help find a finalized wing design. Once this research is complete, I will share my AI transcript and be finished using AI for the rest of the project.
This blog post is an in-class assignment, made to explain what the timeline of my project and what I am designing.
For my personal project, I have designed a definition statement. The aim of my project is to design a RC plane that has wings optimized to limit both noise, while increasing speed. The design would have more of a military aspect. The final outcome would be achieving a speed that would be compared on a thrust to weight ratio of an early design XP-86 Sabre (The First Non-Rocket Plane to Break Sound-Barrier). The main users would be both military and some few commercial supersonic airlines. Many companies have attempted tasks very similar to this. Some of these companies that attempted this style of design include Lockheed Marin, Boeing, and British Aircraft Corporation.
This project would be meant to fix a problem many airlines have had. Supersonic travel is something that has been around for a very long time. The only problem with supersonic travel is what happens when you break the sound barrier. A large boom follows the certain speed being broken. This boom can injure people that are within a certain range. It can also damage buildings and other things on the ground. Commercial airliners that can exceed this speed can only travel that fast over uninhabited areas such as oceans. This limits the amount of flight routes these planes can travel. Another use for this design would military operations. Although they already have many planes that can travel these speeds, they still make the loud sonic boom. If they had technology that limited the sonic boom, they could create a high speed stealth plane that could fly undetected over densely populated areas.
I have had many different ideas come into my mind while thinking of how to solve this problem. These include:
Ogival Delta Shaped Wings
Two stage liquid fuel engines
Turbofan engines
Ram-Jets engines
Scram-Jet engines
Gull Wing design
Swept Back Wing design
Compound Delta Wing
Adaptive Cycling Engines
Thrust Vectoring to add stability and Control
These ideas are different solutions that would need to incorporated and combined into other ideas to solve this problem. Ram-Jet and Scram-Jet engines are highly complicated and it would be unlikely for me to be able to build engines like these in the time constraint.
Prototype
The prototype would be an RC airplane with a new wing design and engine design. I would need a simple RC plane with electronics already built in. I would need new engine design and a way to limit noise. This could be as simple as a new 3D printed propeller that maximizes speed and reduces noise. This could also be a new wing design, tested in a cheap wind tunnel( coloured water) that shapes the way air flows over certain areas of the wing. I would laser cut a lightweight base and then use a heat gun to add a lightweight plastic foil on the top of the plane.
Step-By-Step Build Process
I would start by designing a plan on what materials would be needed and what I could do to modify this plane to the certain standards required in the amount of time that I have. (February)
I would then start to plan the modifications that would be needed to done immediately. (February)
As soon as I receive the plane that I would be modifying, I would gather information such as weight and top speed. This would give me control data that I would compare my final test with. (March)
I would then start to turn my design ideas into CAD projects and possible laser cut jobs. This would only be for wing design.(March)
I would turn my design ideas into real-life modifications to the wing design. (March)
I would then test the noise reduction and top speed after only modify the wing section of the plane. (April)
Then, I would move on to the engine section of the modified airplane. I would plan the modifications needed on paper to start. (April)
I would turn these modifications into a CAD design next. (April)
I would order any needed pieces next so they would arrive before my next test. (April)
I would add all of the modifications to the engine and prepare for my test. (April)
I would test the fully modified airplane. I would look for speed and noise compared to my control test. (April-May)
Overall, my personal project is solving a problem that many companies have tried to solve for multiple years. I will have to work fast and design interesting new solutions to a complicate problem in a short time. I believe that I will be able to complete this before May 5th.
In this assignment, my group was tasked with creating a vehicle that could travel 10km on a certain planet. Our group was given the planet Enceladus. This planet is mainly made up of ice and snow on the surface. Our group decided that trying to create traction on these difficult surfaces would be very complicated. Enceladus has water at 40km under the surface. We decided that it would be an interesting challenge to try to create a submarine that could travel the distance underwater. The definition statement that my group came up with is “The 4 astronauts operating the vehicle need to be able to operate and traverse in cold underwater temperatures of -201.67 celsius, uneven terrain, keep stable in high pressure conditions, and stay energy efficient so the vehicle is able to travel at least 10 km at one filling of energy while not leaving a detrimental impact on the planet for future missions.”
The test we decided to conduct was a simple underwater propulsion test. We connected a fishing buoy to the submarine to track where it was underwater. This buoy would allow us to capture efficiency with a still camera that wouldn’t have to be underwater to track the submarine. We hoped to learn if our submarine would be able to propel itself without floating. We had weights on stand-by in case the submarine floated.
Our final solution included a section of the submarine that allowed water to flow in. This way, we didn’t have to worry about buoyancy. Our first test proved unsuccessful with our old submarine. the submarine was too light to sink so it would float on the surface. It did however stay watertight which was a bonus.
We also built a separate section for all electronics. This section would be more watertight than the others because safety was our top priority. We had problems with overcoming friction with our engine so we decided to get a new motor. This motor has a higher torque so it would theoretically overcome the force of the friction. We also purchased lower friction tape to help with this problem.
This shows the device we used to hold our magnets. This would connect with the motor on the inside, removing the problem of water getting near the engine. There would be a similar part on the outside of the submarine with the same magnets. We struggled with holding the motor in place so we designed a part to hold it in place. This removed the added worry of the engine falling out and not receiving any power. This also changed the worry of having the motor on an angle and the submarine driving on a weird angle.
Everything written up to here was completed before testing our project.
When my group went to test our submarine, we could not the get internal engine to connect to the external engine. The force of the engine was too powerful for the magnets we had attached to connect and spin. Because we could not get the magnets to connect, we could not create any propulsion for our submarine. We did conduct a buoyancy test. Sadly, our submarine was still slightly buoyant and we needed to attach counterweights for it to sink. Another problem that occurred was the inside of our submarine, where the electronics were housed, proved to not be watertight. We had tried to watertight the inside of the casing but it proved unsuccessful. Since we had tried to create an area in the submarine where water could flow freely, therefore allowing the submarine to sink, we had to decrease the thickness of the inner walls. This slight change, and not being able to watertight the bottom of the inner casing, proved to be a large problem. The electronics on the inside we quickly doused in water because the inner wall was too thin. Since the engine could not create any propulsion, we were not able to calculate efficiency. Therefore, our submarine had an efficiency of 0%. We were planning on filming our test, but because our submarine had zero propulsion, there was no test to film. Our group calculated an estimated energy intake of 130-180J. We assumed the submarine was moving at 1 m/s and had 1 amps of current flowing through our circuit. We also assumed our submarine would have a realistic efficiency of 15%. We also calculated how much energy would be required to travel one metre with the current assumptions made. This ended up being around 9 J per metre. This estimated efficiency would have been considered a massive success. We had a powerful enough engine for these speeds but we would have needed to have certain factors go our way to achieve this high speed of propulsion.
Conclusion
For the next time I build a submarine, there were a few key takeaways that I would try to improve. To start, I would make sure that anything going underwater is properly sealed. A problem our group encountered was not having the inner compartment water tight. This proved to be a fatal problem and was definitely a key takeaway. Another problem my group ran into was access to the electronics. We wanted to have the top part of the submarine sealed, so we had to seal it with watertight tape. The problem with this was we immediately lost access to our electronics before we could attach the outer engine. We also tried to overcome the problem of our submarine turning into a boat. We did not have enough weight in the submarine, so it would float. We tried to come up with a solution, but the material we were using was simply too lightweight. In the end we had to attach counterweights to optimize the underwater depth control. As mentioned previously, the material that we were using proved to be ineffective. It was too lightweight and could not resist water at the sizes we needed to store our electronics. The final problem that my group encountered was not having enough project ideas at the beginning. We had come up with a few simple ideas that would have proven to be ineffective. Due to the fact that we had so few ideas, we had to pick an idea that was more complicated, and ended up being the reason that our submarine could not create any propulsion.
Conclusion Part Two
Some of the problems that would have arisen if we had travelled to Enceladus in modern times would have proven to be fatal. To start, the submarine would have to be designed completely differently to account for the high amounts of pressure under the 40km of ice on our planet. We would have had to re-enforce the walls of the submarine with internal beams and find ways to create an internal system that kept oxygen flowing throughout the entire submarine. Another problem that would have arisen is the vast amounts of energy required to make the trip. We would have had to bring the fuel from earth which would have made the trip very difficult due to the extra weight. We also would have had to use most of the fuel getting to our planet, while still saving some for the return trip. As mentioned previously, Enceladus has ice for 40km before reaching water. To reach this depth would have been a very difficult challenge while detrimentally impacting the planet for the upcoming future. There are no current machines that could drill the hole needed to allow the submarine to reach this depth while still carrying four passengers. Another problem that occurs with the depth issue, is retrieving supplies. Modern technology does not have the precision to drop the crucial supplies necessary to complete our mission in the hole that we previously (by a miracle) had been able to dig. We would have had to bring all of our supplies on the submarine which would have once again, increased the weight, making the trip to Enceladus, not evening mentioning the return trip back to earth incredibly difficult.
Overall, this project taught our group crucial team work and critical thinking skill required when designing a complicated project. Although our project ended up failing, we learned crucial lessons throughout the design process that will help us with any future projects similar to this.
I used no AI for any aspect of the process of building or testing our project. I felt like there was no need for AI throughout this project. I am not sure if my group used AI, but I did not use any AI.
For this assignment, my group was tasked with building a mode of transportation for 4 astronauts on a different planet. We can use any mode of transportation and come up with a statement of how to test our design. We can’t test temperature or low gravity, but we can test moving the rover and scale to hold enough people. My group chose Enceladus as our planet. Enceladus is a moon in orbit of Saturn that has potential for life on the planet. It has been confirmed that there is water on the planet, and it could be suitable for life. We chose this planet because of the water and terrain that would be easy to navigate. The water allows us to bring fewer resources and possibly move under the ice. We would not have to worry about keeping food cold, and transportation would not have to be diverted because of on-ground obstacles. We also chose this planet because extensive research has been conducted on it. Water is definitely an opportunity. It could host life with a bit of support. Some challenges are that the surface is very cold and hard to live on. Water freezes easily, making it hard to take off and land with rockets. Most of the energy would be used to keep living conditions warm, wasting it compared to other planets. The fuel would have to be something that doesn’t freeze at those temperatures, or something in the design would have to change the fuel from solid to liquid, if possible. We would also have to make the vehicle very durable, since it is one of Saturn’s moons. Since there are so many moons, there might likely be a collision or debris coming into contact with the vehicle. This means we have to strengthen the vehicle to withstand the blast, while keeping weight down. We would have to use a certain metal to meet the criteria. NASA has done an extensive amount of research on this planet do to the amount of water that is being produced. NASA gave us most of the information that we used to both deep dive and choose the planet. We also used some documents written by Scientists that explored Enceladus with new-age telescopes and other thermal imagery to expand our knowledge on Enceladus. The thermal imagery showed spots of a water-like substance and something called the tiger stripes. NASA used a new satellite called Cassini to capture these thermal images. Enceladus was discovered in the 1700s, but our knowledge has been expanded with technology like the James Webb Space Telescope to get higher definition images from a closer distance. Overall, the collaboration of different scientists has given us the information that we have today.
There was no AI used on my part. If my group used it, I am not aware of that.
NASA. (2024, November 4). Enceladus – NASA Science. Science.nasa.gov; NASA. https://science.nasa.gov/saturn/moons/enceladus/
Diamond in the Dark. (n.d.). Airandspace.si.edu. https://airandspace.si.edu/air-and-space-quarterly/summer-2023/enceladus-life
Enceladus in the Infrared. (2020, September 18). NASA Jet Propulsion Laboratory (JPL). https://www.jpl.nasa.gov/images/pia24023-enceladus-in-the-infrared/
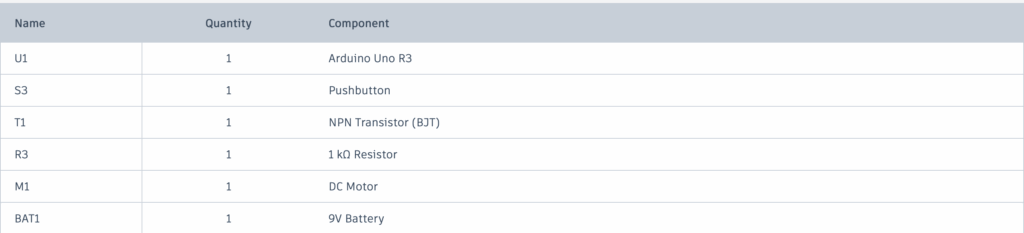
For this Fusion assignment, I had to use both TinkerCad and Arduino to build something that moves. We also had to use C++ to code the movement.
I started by looking at TinkerCAD for previous examples of this working. I found one that had all of the components that I needed. I started with a breadboard and an Arduino Uno to relay a signal. I started by connecting the Ground power to the negative terminal, allowing a charge to flow through one side of the circuit. I used another wire to connect the negative sides of the circuit together. Since I didn’t want the motor spinning out of control, I used an NPN transistor to monitor the amount of energy going to the motor by having the collector connect to the DC motor and the emitter connect to the negative input. Since I wanted to control the amount of power running through the breadboard, I used a resistor to monitor the flow of current coming from the 9-volt battery to make sure the breadboard does not overheat. I then connected the negative part of the breadboard to the push button, which was also connected to the NPN transistor. Using the 9-volt battery, I connected the positive side to the positive side of the DC Motor to make sure the motor spins in the right direction. I then connected the negative to the negative part of the breadboard to give power to the circuit.
Code
I was struggling with the code, so I used the code from the previous example that gave me the inspiration for the circuit. The code uses Pin 3 as an input and Pin 5 as an output.
Because of this, Pin 3 normally reads as high unless connected to GND, like when the button is pressed. In the loop that is programmed, Pin 3 is constantly checked. This means when the button is pushed, Pin 5 is turned on until Pin 3 reads High.
if (digitalRead(3) == 0)
digitalWrite(5, HIGH);
else
digitalWrite(5, LOW);
This makes the push button work and connect to the DC motor in the least amount of code. I tried building this circuit in real life, but I couldn’t get it to work on camera, so I am not uploading a video.
// the setup function runs once when you press reset or power the board
void setup() {
 pinMode(3, INPUT);
  digitalWrite(3, HIGH);
  pinMode(5, OUTPUT);
}
// the loop function runs over and over again forever
void loop() {
if (digitalRead(3) == 0)
    digitalWrite(5, HIGH);
  else
    digitalWrite(5, LOW);
}
Overall, this project tested my designing and building skills to create a project that would work.
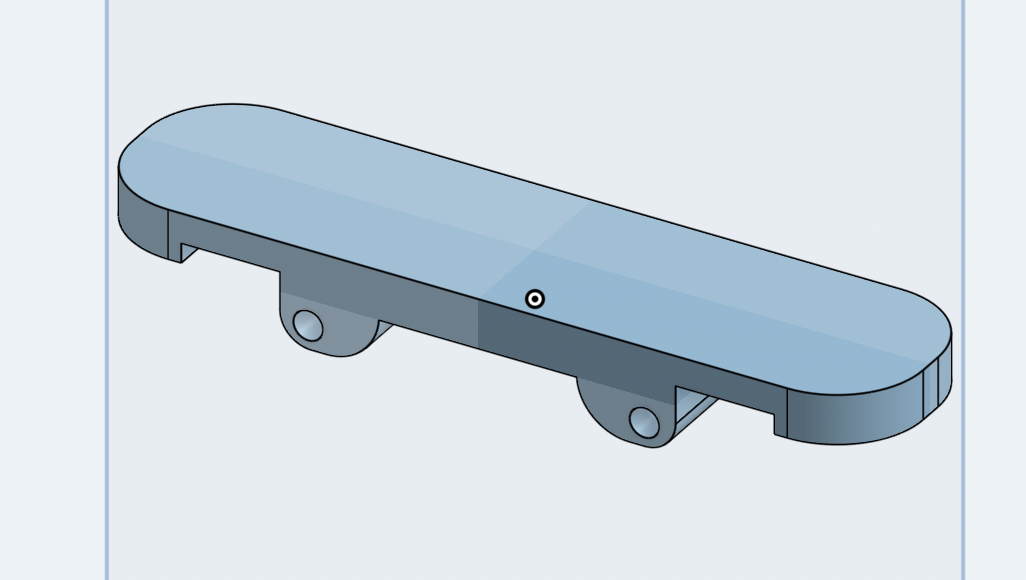
For this assignment, we were asked to create a simple project in Onshape, testing our skills on that platform. We were told to make something simpler, like a skateboard, rather than a functioning NASA-level rocket. With this in mind, I started designing my skateboard. Keep in mind, I hadn’t used Onshape for a while and my skills were a bit rusty.
I started my design by creating a sketch. This allowed me to draw a simple rectangle in the middle of the screen, which would end up becoming the base of the skateboard. I then used the Extrude tool to turn the base of the skateboard into a 3d object. Now I had a 3d rectangle with no curves which was my objective. Using the Fillet tool, I added edges on the base of the skateboard to give it a more accurate representation. I then added another rectangle on the bottom to create the area that the wheels would be attached. I then had to use the Extrude tool again to remove the bottom part of the base to then be able to create the part that holds the wheels. I created another sketch of another rectangle to build the actual wheel base. Using the Extrude tool once again, I created the rectangle in the middle of the skateboard. I then created another sketch of 2 circles in the bottom of the base to create the spot where the axel will go. Using the Extrude tool again, I created a hollow part in the middle of the base for the axels. The base of the skateboard was nearly complete. I still had a weird chunk on the bottom so I hade to create one more sketch and then Extrude to get rid of that part. To create an aerodynamic looking skateboard, I had to use the Fillet tool on the bottom of the base to shave off some of the unimportant material at the bottom that makes the skateboard look artificial.
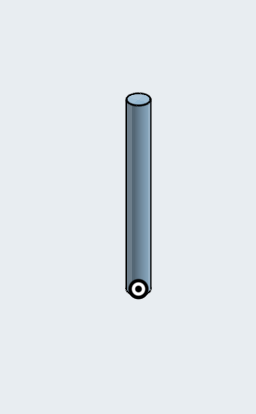
Moving on to the second of three part studios, I had to create the axels that would connect the wheels to the car. This was very straight forward. All I had to do was sketch a simple circle and then Extrude to the length that I wanted. Since I was going to put everything together during the Assembly phase, I only had to sketch one.
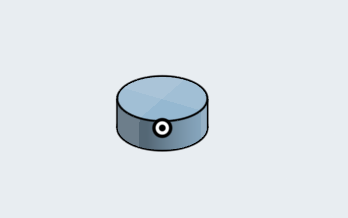
I then started working on the wheels which, as the same as the axels, I only had to draw one wheel using the sketch and Extrude tool. Since I wanted the axle to fit snug into the wheels, I had to create another extrude and have it go all the ay through the tire. I know had a tire with a hole in the middle. I created one more extrude and put another circle in the middle of the tire and extruded up to a length where the axel would fit snug.
Once I had completed all of the pieces, I had to put them together in the Assembly window. Since I had only sketched one axel and one tire, I had to duplicate them in the assembly window. Assembly was one of the hardest parts because I had to line up every individual piece and make sure they all fit together. I then had to create a blueprint of everything that I had made and also a Bill of Materials. I then realized that I just simply lined everything up in the assembly window, which was incorrect. I learned how to use the fastening tool to attach the wheels to the axle. This connected them and had them move together. Then I used the rotate tool to have the axle move into the centre of the skateboard, which would let it behave like a real skateboard. I now had a skateboard that could actually move.
Overall, this project taught me crucial skills about how to use Onshape, which will be crucial throughout the year. This was a fun way to test my skills and learn more about how to use certain tools like the Fillet tool.
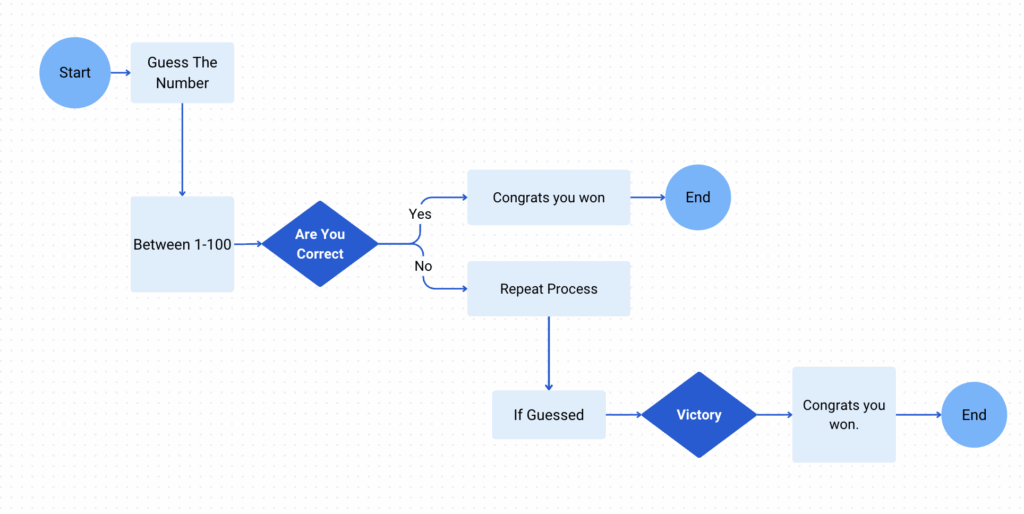
For my coding assignment, I was asked to design a simple code with the help of AI that made a game. For someone with no background in coding, this was a daunting task. I had to start by asking Gemini, “Please guide me through coding.” This was probably one of the hardest parts. Gemini wants to just do everything for you. Once I got it to help me step by step, I started to make progress. This coding assignment took me more time then I thought it would because I thought I knew more about coding than I did, and I didn’t realize how much de-bugging you have to do.
The Code
Before I get into the coding part, I want to say that the most important aspect of this assignment was a user friendly design. I added funny text results and an easy way to enter the number. I also didn’t want the game to crash on a misprint so I made sure that even if a letter is entered, the game wouldn’t crash. I start with import random to tell the code that I am giving it a set of numbers, and it has to pick one. Then I move on to telling it that the “secret number” still has to be picked at random and is between 1 and 100. Using import random and secret number, I was able to create a different number every time.
while True:
    try:
        guess = int(input("Enter your guess (between 1 and 100)If you dare!: "))
        if guess < 1 or guess > 100:
            print("Please enter a number between 1 and 100.")
This would allow the player to try again and not know the answer. I then say enter the code for the actual guessing of the number. I knew one of the hardest parts would be that someone may try to crash my program by entering and letter so I told Gemini to help teach me how to change that. I used the else and break command to keep the input valid and ValueError to give the response if the input was wrong. Then using the greater than and less than signs, I added more text prompts for correct guesses.
else:
            break  # Exit the input loop if the input is valid
    except ValueError:
        print("Invalid input. Please enter an integer.")
When debugging, I realized that I hadn’t adding headings and Gemini helped me fix this error. Then, saying else helped because if the answer wasn’t a number like I mentioned before, I could change the response to make it something that would notify the person to enter an integer. It would also work for if the answer was over 100. Once again using the greater than and less then signs, I was able to add text prompts to tell the player if their guess was too high or too low. Once again I had some help from Gemini on the code mumbo jumbo while debugging this part of the code. Then using the code from before, I looped it so it would run until the player guessed the number. I used a lot of excepts and while because this code had many factors that need to be filled before the end result. The looping part was tricky as well so I tried a few times but then resorted to Gemini to help me out. I defined a function to loop back after every question until the number was guessed. I the had to figure out a way to break that input loop when the response wasn’t a variable and then get back into that input loop.
 if guess < secret_number:
    print("Too low! Juuuuuust a bit outside. Try again.")
  elif guess > secret_number:
    print("Too high! So close. Please Try again.")

print("Congratulations! You guessed the number! Try agian,     if you dare!")
Finishing the code of with print ( Congratulations, one of the few things I remember from when I tried coding when I was 5.
Overall, this coding assignment taught me some critical skills I will need for the rest of the year and how to efficiently use Gemini, which I had never used before. I couldn’t find my Gemini transcripts because I used the Gemini on Colab, so there were no transcripts.
import random

def play_game():
    secret_number = random.randint(1, 100)
    guess = -1

    while guess != secret_number:
        while True:
            try:
                guess = int(input("Enter your guess (between 1 and 100): "))
                if guess < 1 or guess > 100:
                    print("Please enter a number between 1 and 100.")
                else:
                    break  # Exit the input loop if the input is valid
            except ValueError:
                print("Invalid input. Please enter an integer.")

        if guess < secret_number:
            print("Too low! Juuuuuust a bit outside. Try again.")
        elif guess > secret_number:
            print("Too high! So close. Please Try again.")

    print("Congratulations! You guessed the number! Try again, if you dare!")