For this project, we had to build something with Arduino. We used Arduino UNOs to create a project that made something physically move, so something like a buzzer wouldn’t be accepted. For this project, I did not employ the use of AI.
Since I do not have very much experience with Arduino, I decided to do a simple project, just having a mini servo hooked up to the Arduino UNO on TinkerCAD, and coded it to spin slowly, switching directions every now and then.
This circuit works by having three different cables between the Arduino UNO and the mini servo. The first tells the servo it’s supposed to spin, and the second supplies it with power. Finally, the last cable taken the ground current and sends it back to the Arduino once it has gone through the servo first.
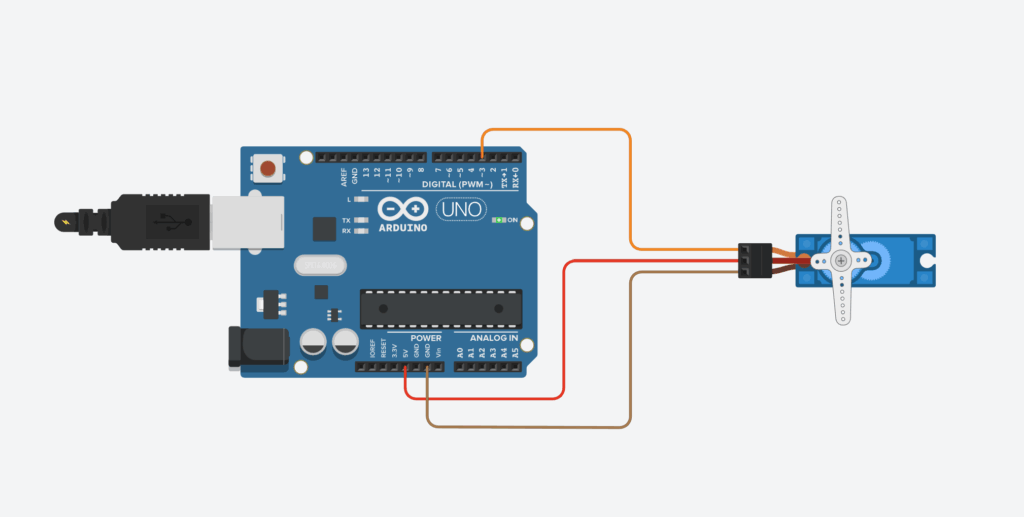
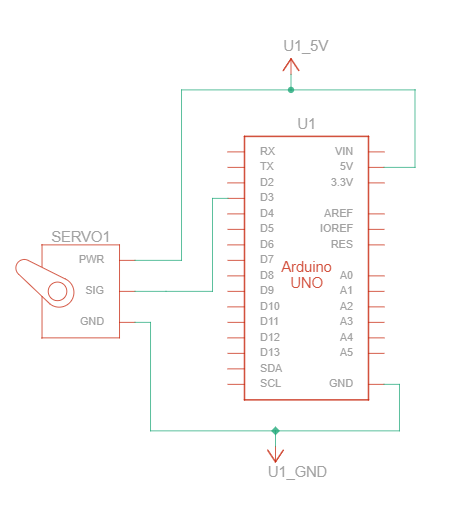
For this circuit, you need two different parts, as well as 3 or more cables. The two parts you require for this circuit are an Arduino UNO and a positional micro servo.
Once you have all these parts, and you’ve put them together to form the circuit, you’ll need to upload the code to the Arduino UNO. Now, if you’re building this circuit physically, you’ll need a few pieces of software as well as a connector cable that links your computer to the Arduino. However, if you’re creating this circuit in TinkerCAD or some other virtual software, you only need the actual code.
The code for this simple circuit is below, and is comprised of two main parts: The setup, where you establish all connected devices, and the loop, which is the actual code the Arduino is running.
#include <Servo.h>

int i = 0;

int j = 0;

int k = 0;

Servo servo_3;

void setup()
{
  servo_3.attach(3);

}

void loop()
{
  for (i = 0; i <= 120; i+= 1) {
    servo_3.write(i);
    delay(50);
  }
  for (k = 120; k >= 0; k-= 1) {
    servo_3.write(k);
    delay(50);
  }
}
If you want to see an example of this circuit running, here is a recording of it in TinkerCAD.
Leave a Reply to mcrompton Cancel reply