I am brand new to Tinker CAD and Robotics, just like I am in the previous 2 projects. I had to figure out something that is easy to do and at the same time help me develop my knowledge in Tinker CAD and Robotics.

The Failed Attempt:
My first idea was to create a mini bumper bot that has 2 buttons on the sides and will turn to the opposite direction when 1 is pressed.
I worked on it for a long time but ran into too many problems that can’t be understood with my current skill level (basically 0 knowledge).

The New Project:
After the failed attempt to make a bumper bot, I though about a new project idea, something that is not as easy but also doable.
I asked ChatGPT for some inspiration and decided to make a small fan.
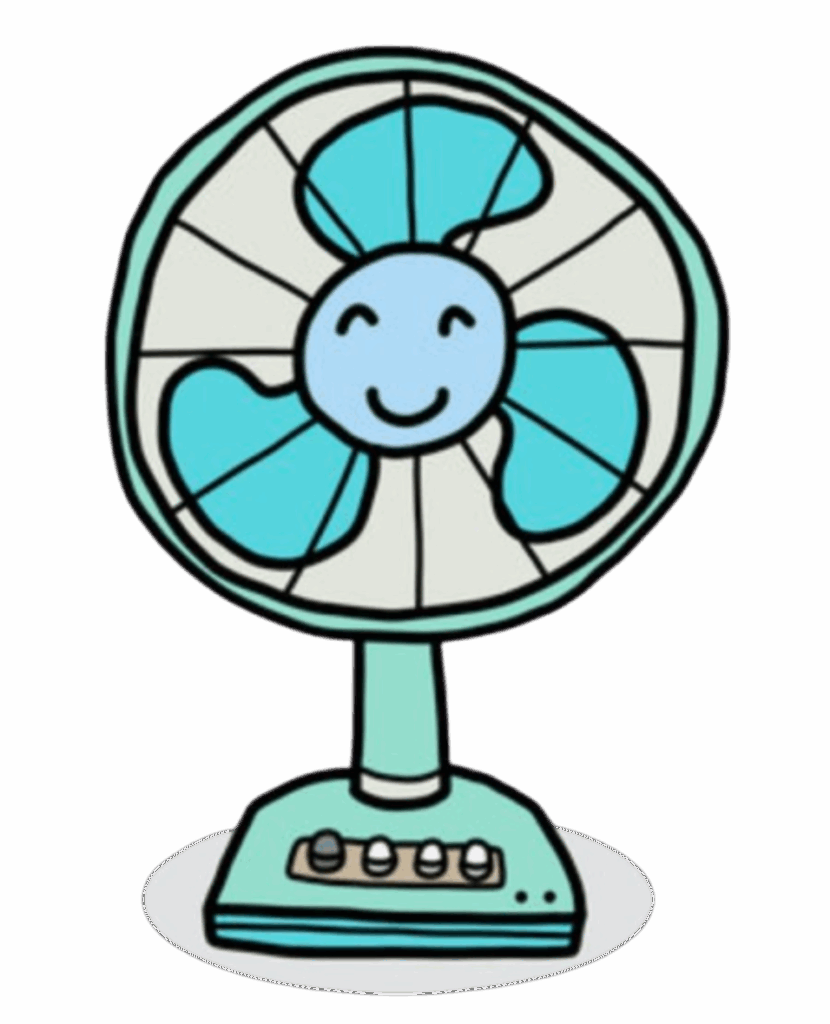
The Intended Device
It is basically a small fan that is powered by a small DC motor that spins when the pushbutton is pressed, and when the button is released, the fan stops.
How doe sthe circuit work:
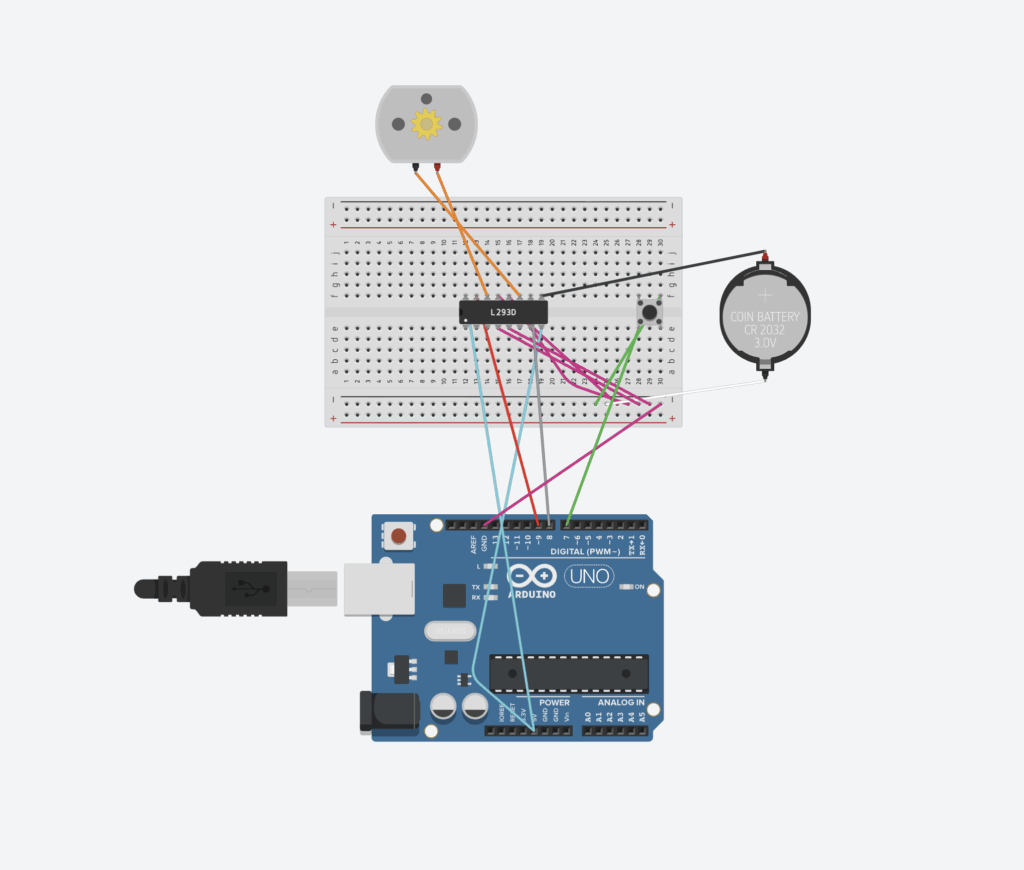
- The Arduino Uno sends control signals to the L293D chip, which makes the motor spin.
- L293D
- Pin 16 connects to 5V on the Arduino Uno to power the. chip logic
- Pin 8 connects to the 3V battery to power the motor.
- The motor is connected to pins 3 and 6 of the L293D, which helps the motor spin in different directions.
- Pin 1 of L293D is connected to 5V on the Arduino Uno so that side of the chip is enabled.
- I made a shared ground for the GND at the second last row of the breadboard so that all GNDs are connected and is prevented from explosions or shorts.
- A pushbutton is placed across the center gap of the breadboard and connected between pin 7 on the Arduino Uno and the ground.
- When the button is pressed, it sends a signal to the chip to spin the motor, and when it is released, it stops the motor.
Bill of Materials (BOM):
| Component | Quantity | Purpose |
|---|---|---|
| Arduino Uno | 1 | Main microcontroller |
| Breadboard | 1 | For wiring connections |
| L293D Motor Driver IC | 1 | Controls motor direction and power |
| DC Motor | 1 | Acts as the fan motor |
| 3 V Battery | 1 | Motor power supply |
| Pushbutton | 1 | Manual motor control |
| Jumper wires | ~10 | Electrical connections |
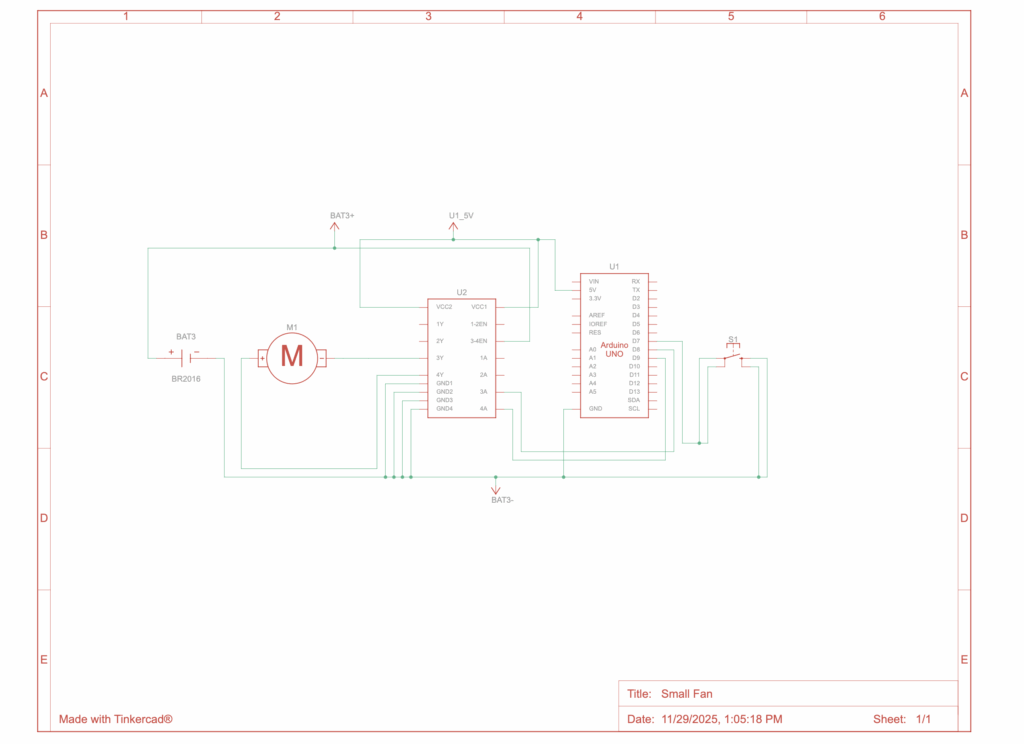
Circuit Diagram
Code:
This is my code for the small fan
const int IN1 = 9;
const int IN2 = 8;
const int BUTTON = 7;

void setup() {
  pinMode(IN1, OUTPUT);
  pinMode(IN2, OUTPUT);
  pinMode(BUTTON, INPUT_PULLUP);
}

void loop() {
  int buttonState = digitalRead(BUTTON);

  if (buttonState == LOW) {

    digitalWrite(IN1, HIGH);
    digitalWrite(IN2, LOW);
  } else {

    digitalWrite(IN1, LOW);
    digitalWrite(IN2, LOW);
  }
}
The first 3 lines tells the Arduino which pins are connected:
const int IN1 = 9;
const int IN2 = 8;
const int BUTTON = 7- Pin 8 and 9 controls the motor
- Pin 7 is connected to the pushbutton
In the setup part, the Arduino prepares the pins so that:
void setup() {
  pinMode(IN1, OUTPUT);
  pinMode(IN2, OUTPUT);
  pinMode(BUTTON, INPUT_PULLUP); // uses internal resistor
}- The motor pins (9 and 8) are set as outputs so the Arduino is able to send power signals.
- The button pin (7) is set as an input with a built-in resistor (INPUT_PULLUP), which keeps it not moving when not pressed.
The loop will run over and over:
void loop() {
  int buttonState = digitalRead(BUTTON);

  if (buttonState == LOW) {
    // button pressed → spin fan
    digitalWrite(IN1, HIGH);
    digitalWrite(IN2, LOW);
  } else {
    // button released → stop fan
    digitalWrite(IN1, LOW);
    digitalWrite(IN2, LOW);
}- The Arduino checks if the button is pressed (digitalRead(BUTTON)).
- If the button is pressed, then the Arduino sends power to the motor and it spins.
- If the button is not pressed, it cuts power and the motor stops.
Demonstration Video:
- After pressing the button, the motor (fan) spins and when I release it, the motor stops spinning.
Reflection on the Use of AI:

I used Chat GPT as my AI to help me
Process:
- At first, I wanted to build a bumper bot, but it kept failing and shorting out. After I talked to AI about it and considering many suggestions, I switched to a fan which is simpler and easier for me.
- The Ai helped me understand the logic of the circuits and explained how each component played a role in my design.
How it worked for me:
- The way that I asked the Ai to help me really worked for me because I am not just getting answers but rather getting suggestions and a deeper understanding for each component.
Leave a Reply to mcrompton Cancel reply