For this project, I decided to go with something that is beginner friendly and something that I may be able to use. I asked AI for several ideas and I decided on creating a desk organizer that includes a stand for my phone since it is always laying around the desk not doing much.
I started with thinking about the things that i would like to put in the organizer (since I might print it out and use it)
A phone stand, a container for pens, a pocket for my AirPods, and a few more extra spaces for other things.

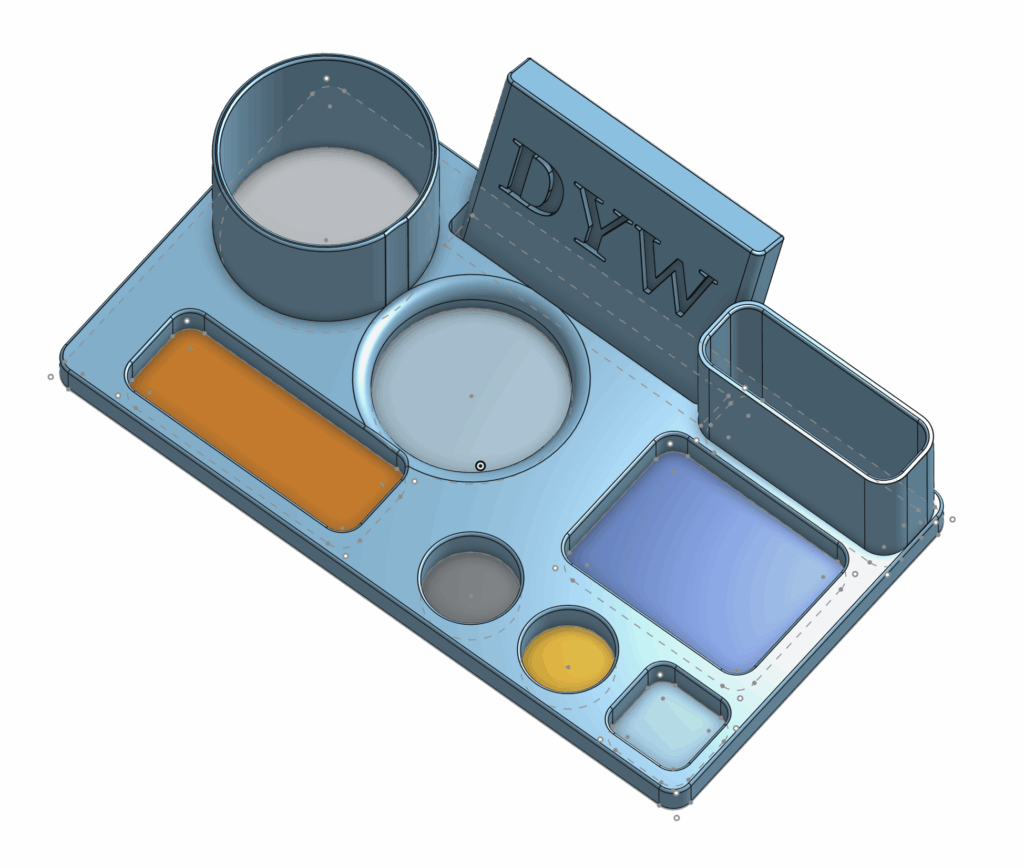
Left tall container -> for my pens
Center block: my phone stand (with my initials on it)
The rectangle at the right to the middle: space for my Airpods
Other spaces scattered around: for different little objects that I might need
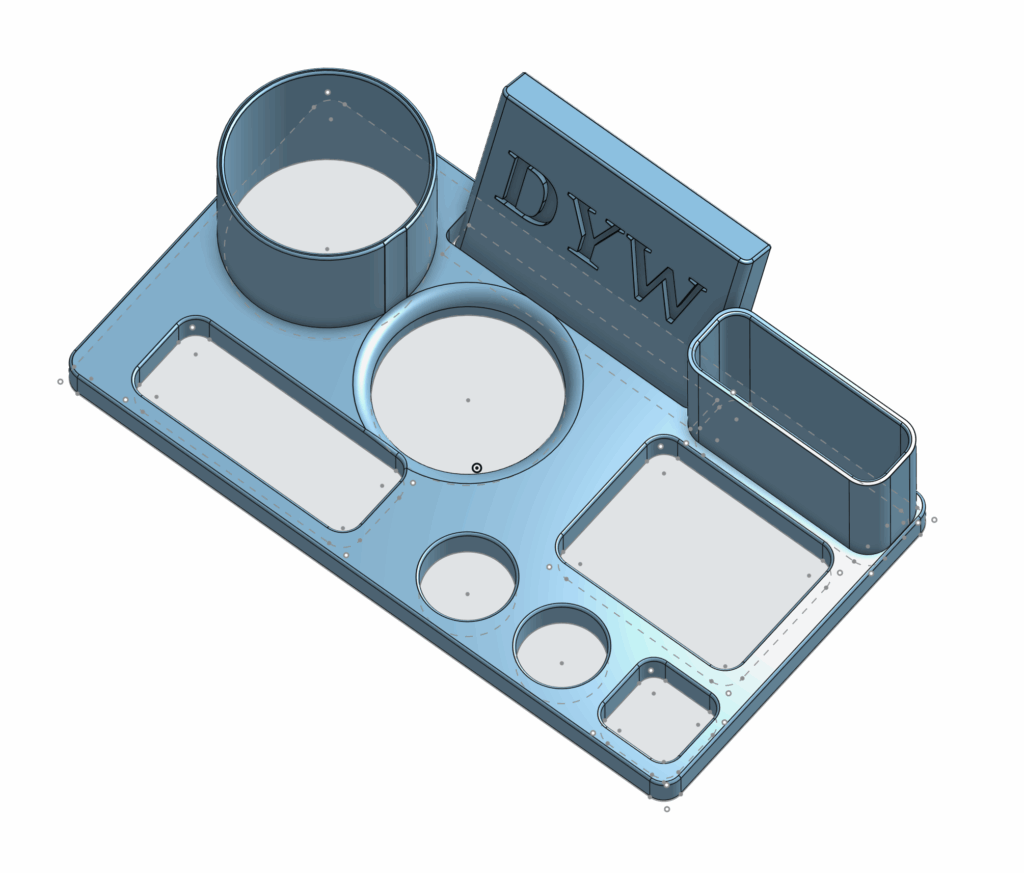
Now that you have seen the entire organizer, lets break it down part by part:
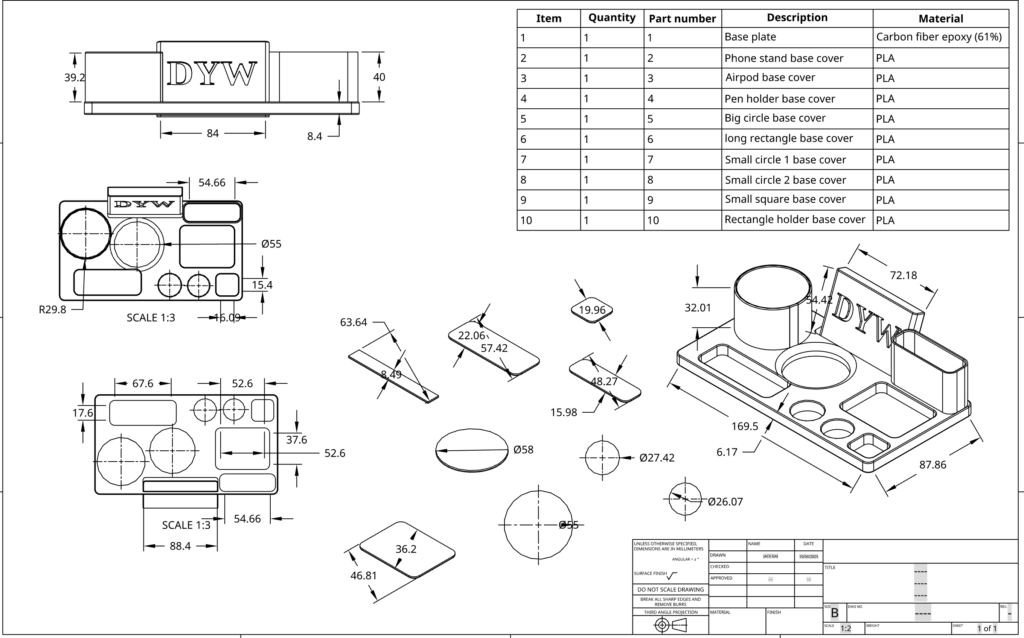
The Blueprint:
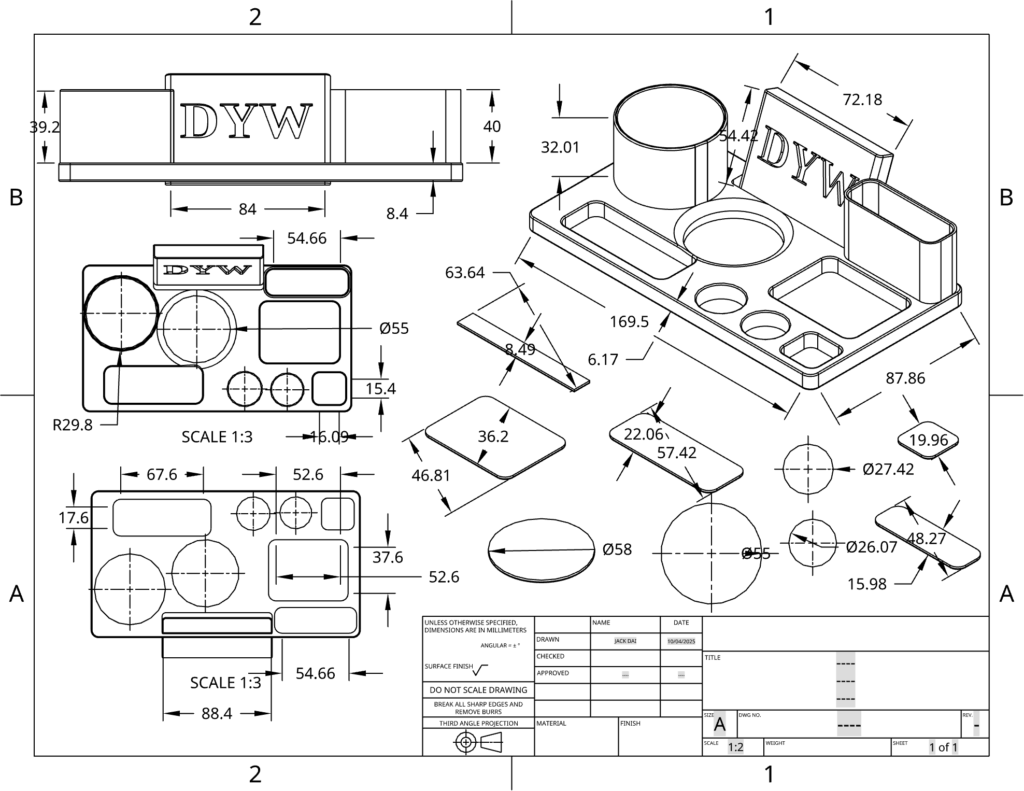
This shows all the parts that were used to make the organizer. The main body is shown in 4 drawings, from the front, from the top, from the bottom, and an isometric drawing.
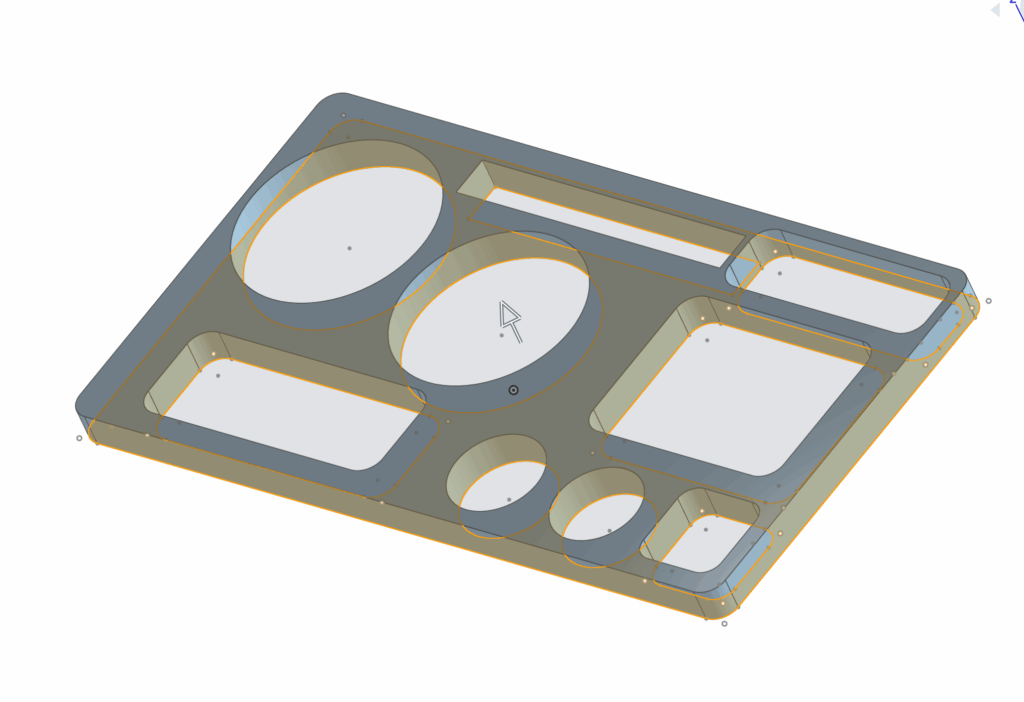
The Skeleton:
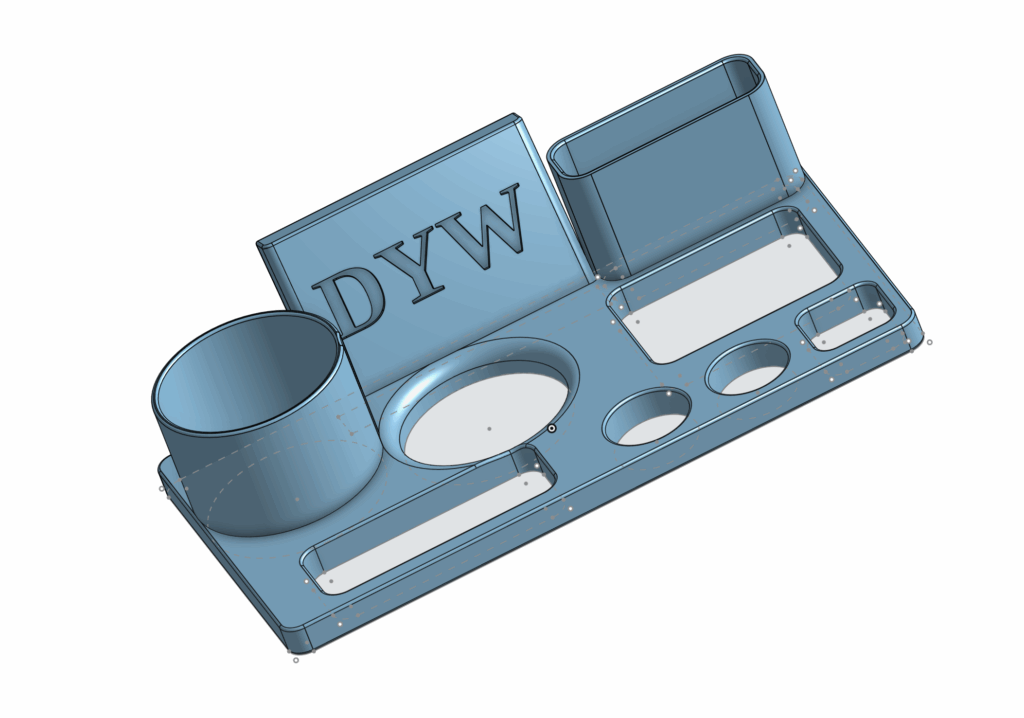
This is the skeleton of the dinasor, the bones of the organizer.
I created this by first drawing a sketch:
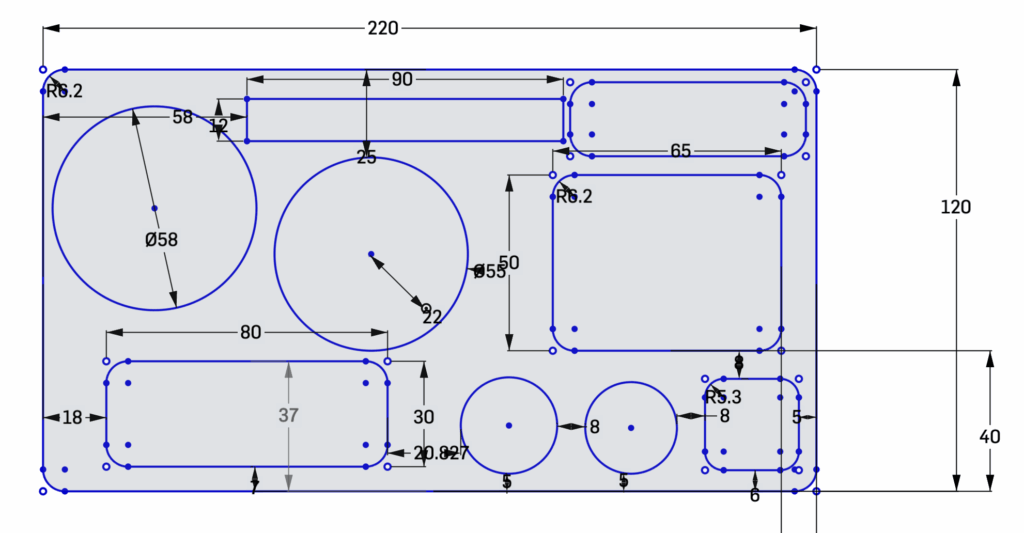
You can see here I have a lot of measurements.
- I have an Iphone 15 Pro Max and I wanted it to stand: thats why I created the slot at the top of the drwaing with a 90mm length, so that the phone can fit in and still have a bit of space on the sides.
- I have a pair of Airpods: so I gave him a big roon, with 65mm of length and 50mm of width.
- I dont have a lot of pens: so I just created a container with a 58mm diameter so that I can fit 3-4 pens that I use daily.
Adding on the meat…
From the sketch comes the extrusion of the base of the organizer, with a depth of 10mm.
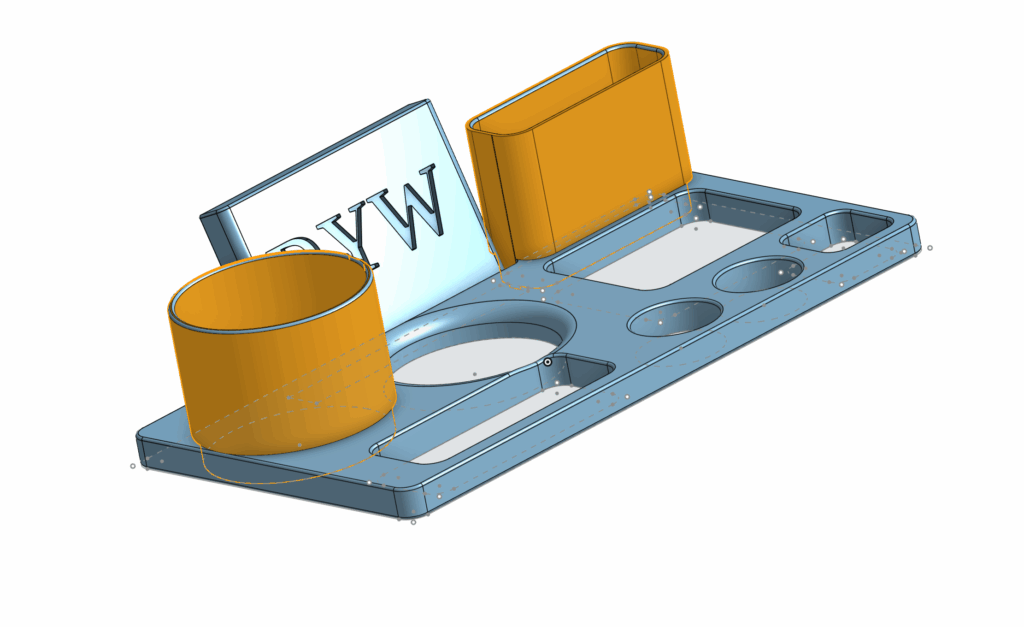
Then I extruded these 2 highlighted parts since I wanted them to come out of the organizer rather than sinking in.
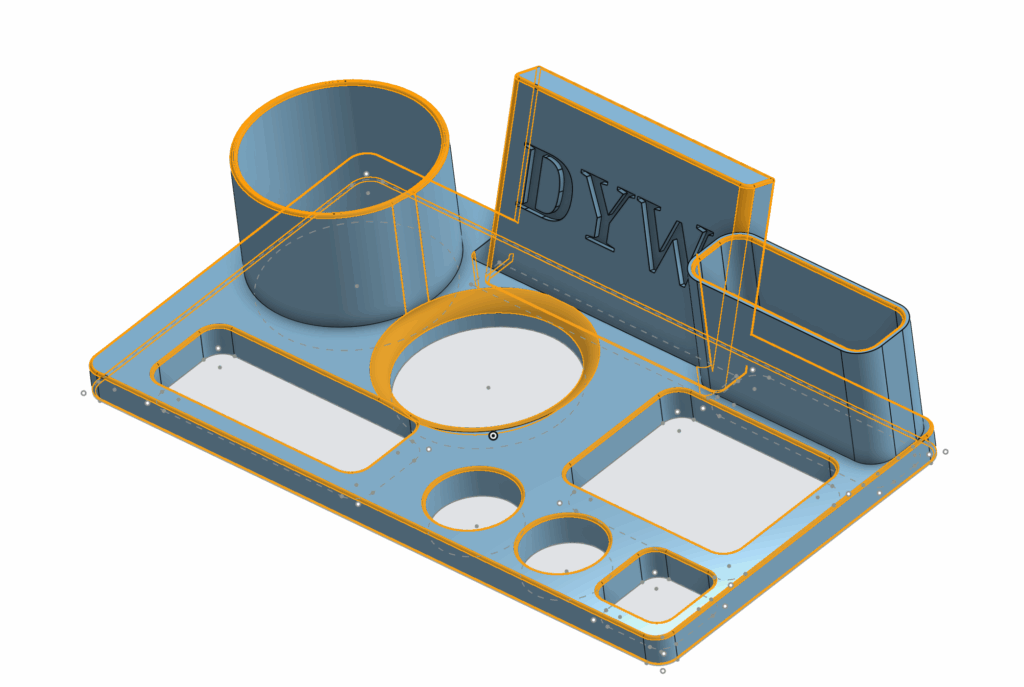
Then I exturded this highlighted part. This will be te stand for my phone and I also extruded my initials (2mm dent)to add a bit more of customization.
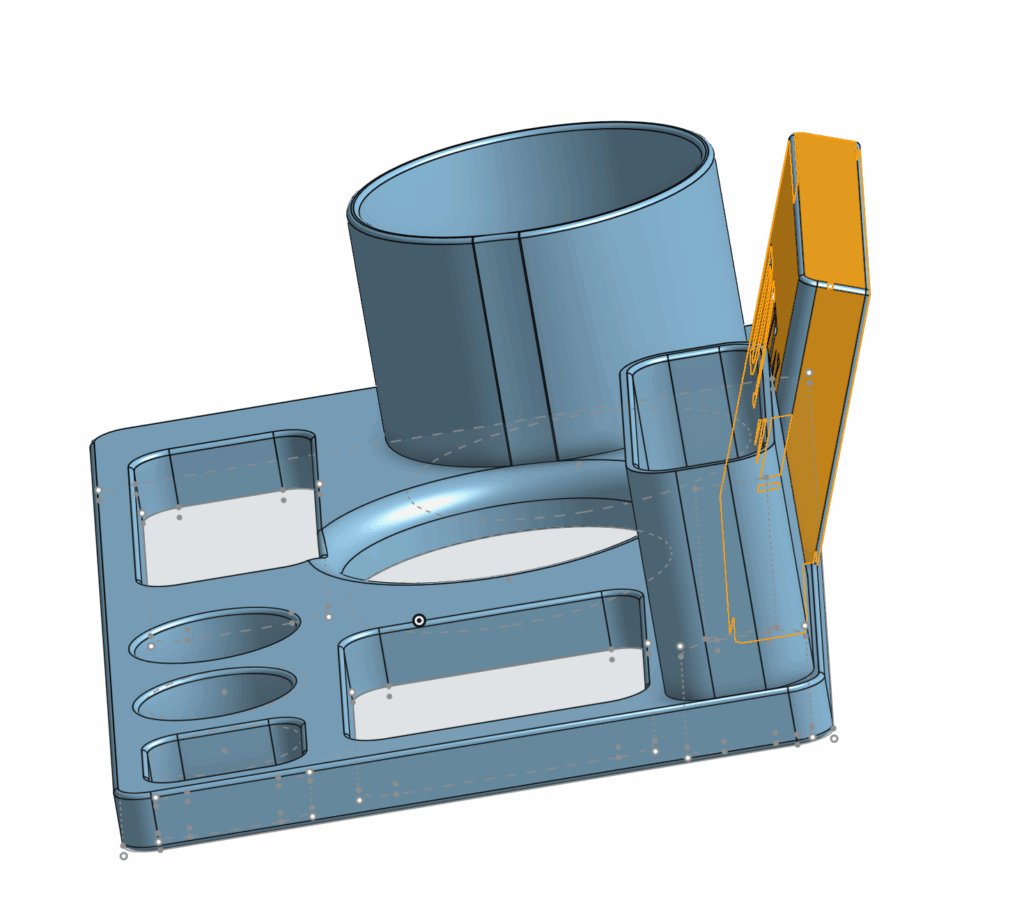
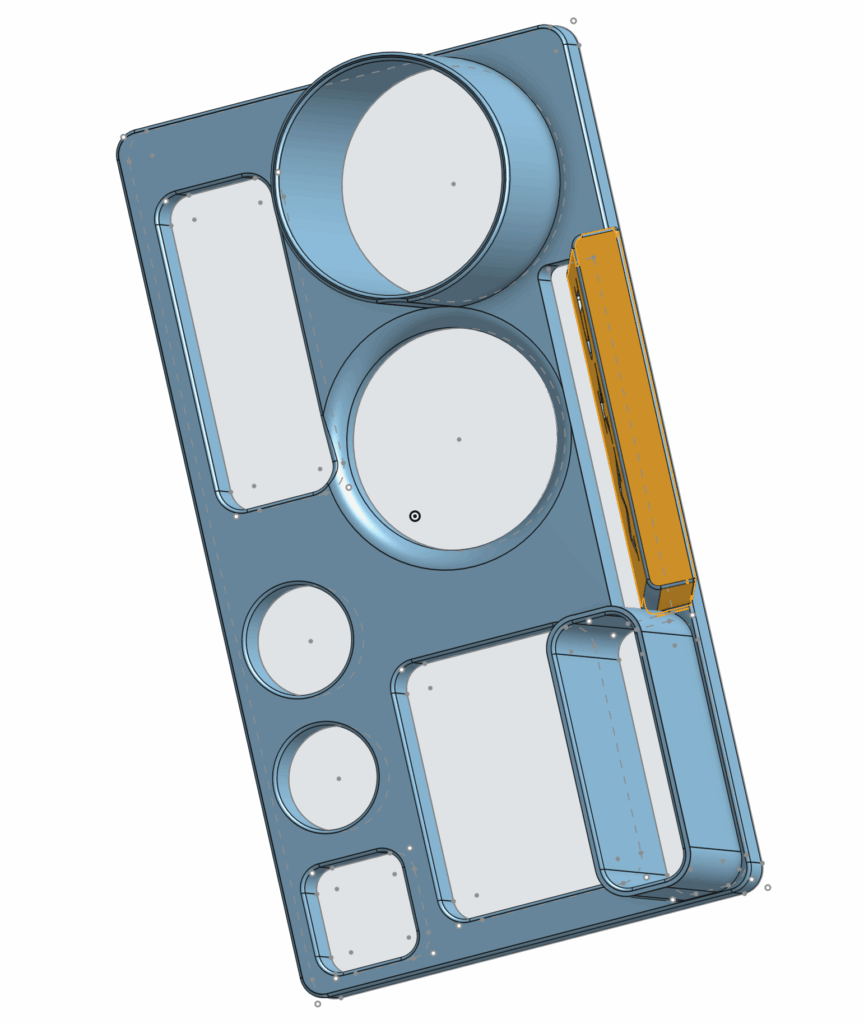
I transformed the phonestand so it slants backwards and so that I am able to leave a room to put my phone in and having the stand as my back.
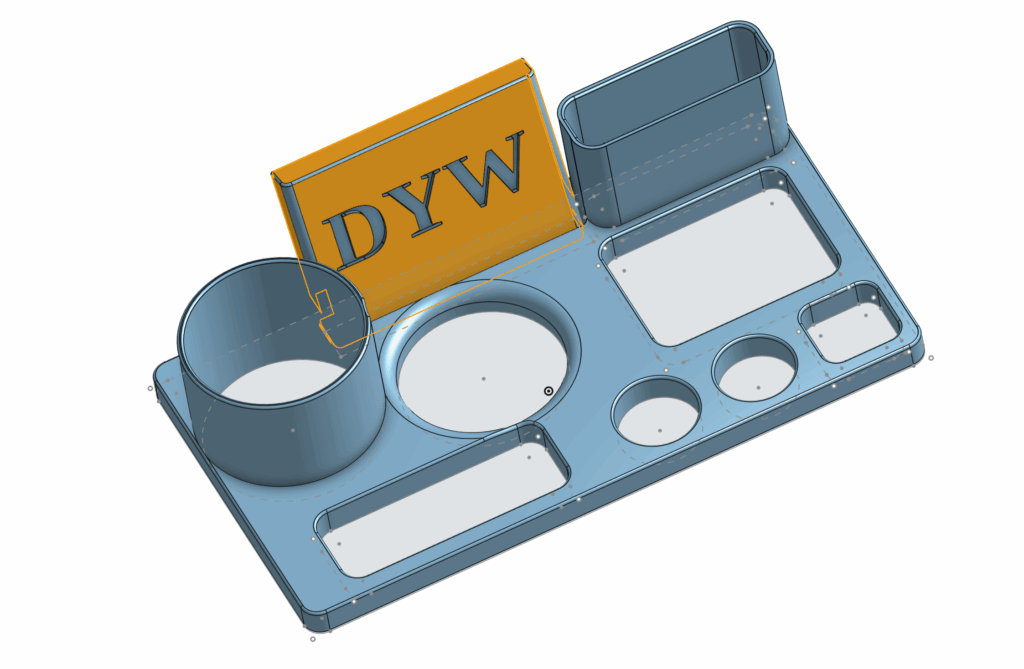
Fine tunning the edges…
These highlighted parts have been “fillet”/smoothed out. This makes the organizer safer (preventing cuts) and also makig it look a lot better than with sharp edges.
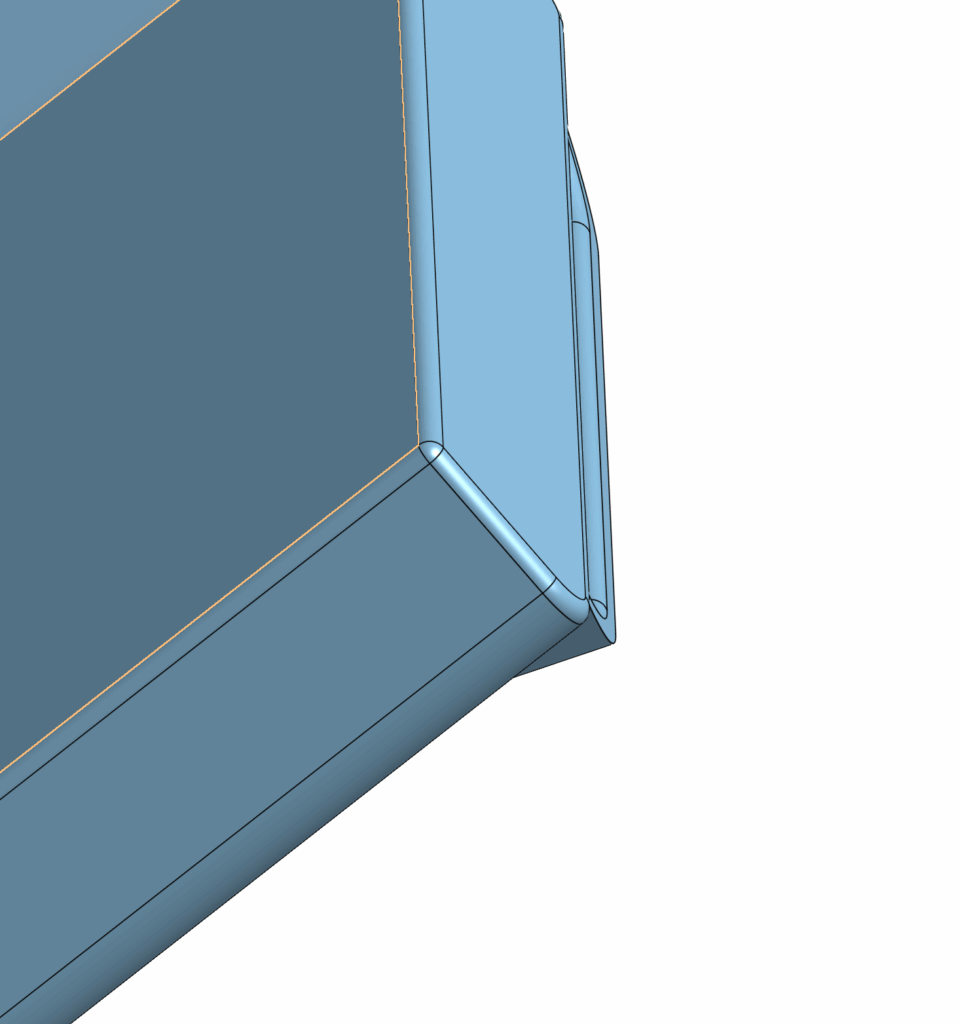
This is a close in picture of a fillet…
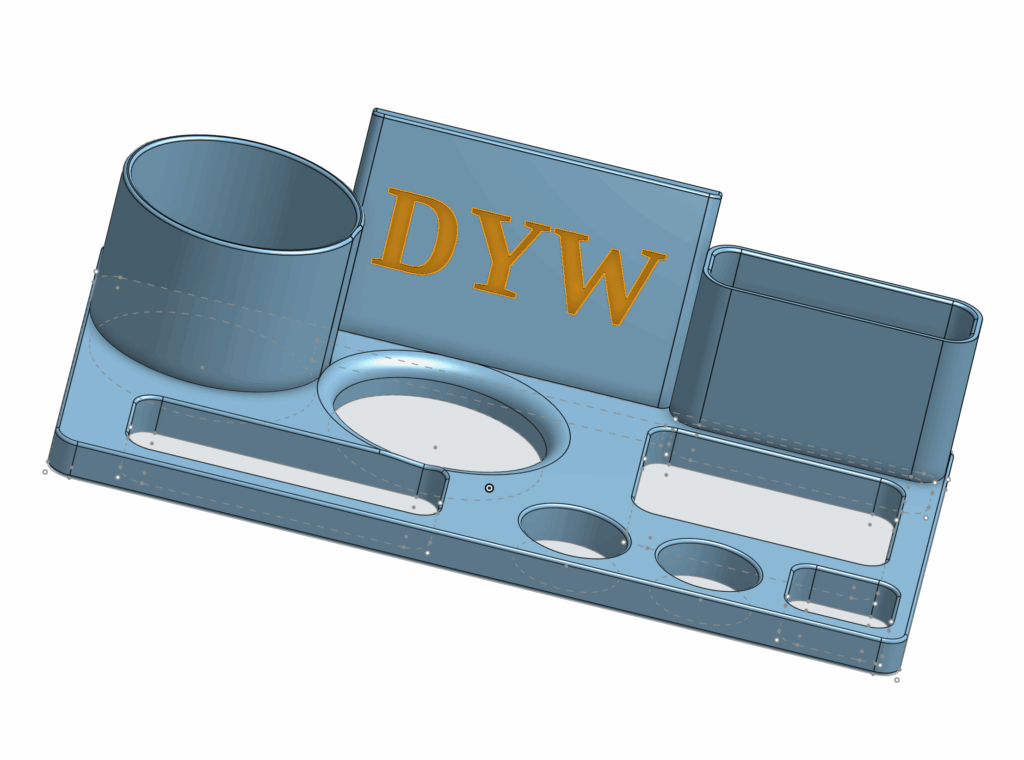
Adding on the scales…
What I mean by scales are the plates that I add under the skeleton and the meat. This is for filling the holes so that I could actually use the oragizer.
Without the scales:
With the scales:
I added the scales seperately because it looks pretty good from the bottom, instead of having just a flat base, I am able to have the plates sticking out a bit, kind of like little legs:

Assembly:
Assembly is where I put all of my parts together. I have 10 parts and in assembly I put them all together to create the final organizer.
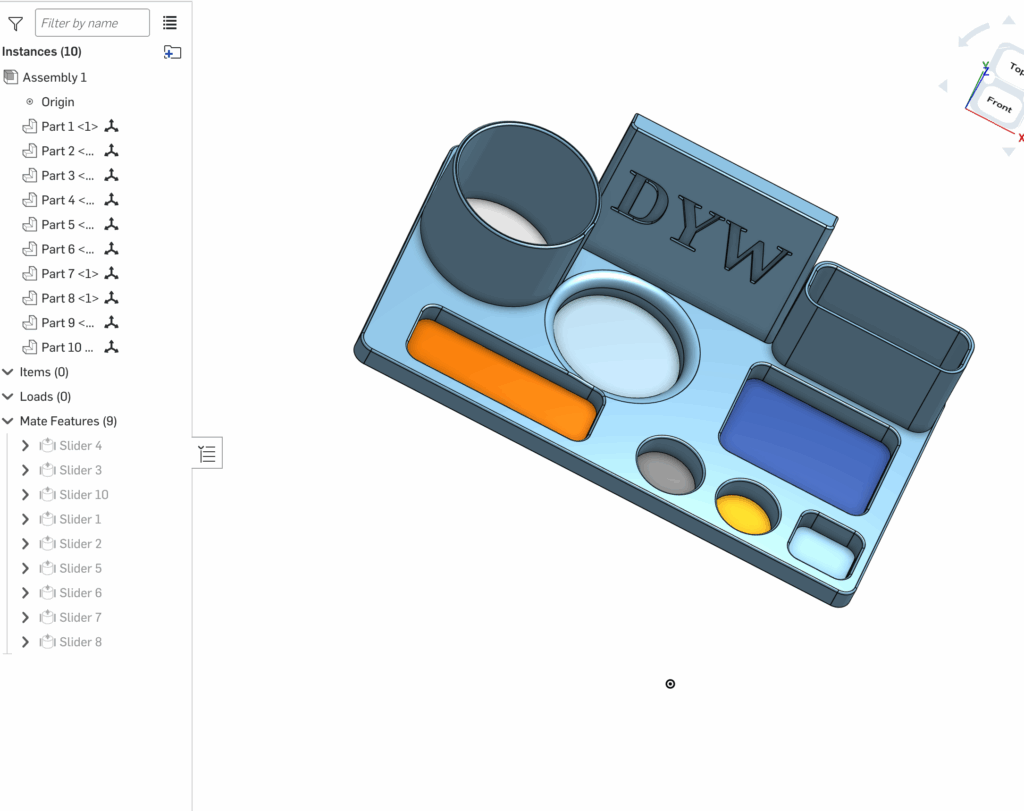
As you can see here, I used sliders to connect the base covers to the base plate.
This is an example of a base cover that I use slider to mount onto the base plate.
Bill of Materials (BOM):
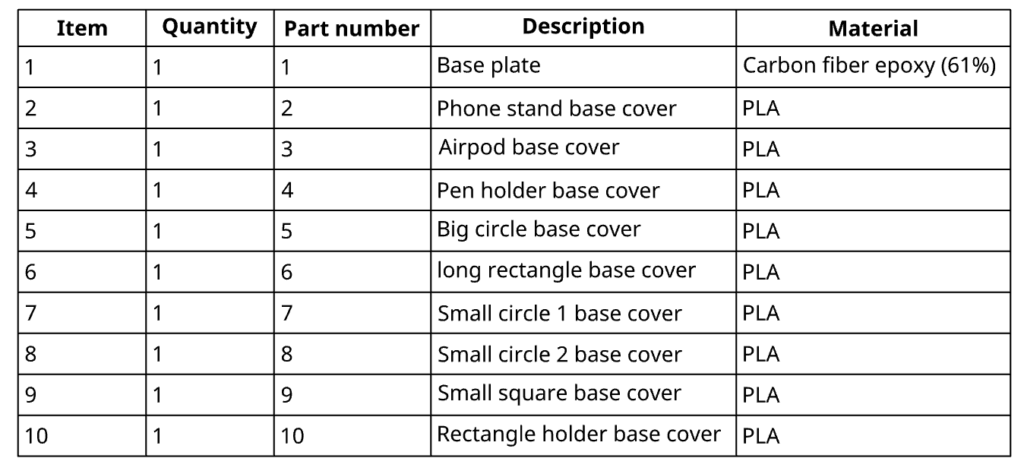
So as you can see here, I decided to make the organizer out of mostly PLA since it is an organizer and would need to be stable and long lasting.
I was wondering whether making the organizer entirely out of PLA would not look that great and not really unique from the other desk organizers I can find in IKEA or Walmart.
Then the idea of making the base plate (the Skeleton) out carbon fibber might be a good idea since I really like the sporty look of carbon fibber and it will look high end and modern.
I also wanted the PLA to be white so that I can have some contrast to the carbon fibber and it would look good since white goes well with black always.
Below is a picture of BOM with the mechanical drawings:
The Final Product:
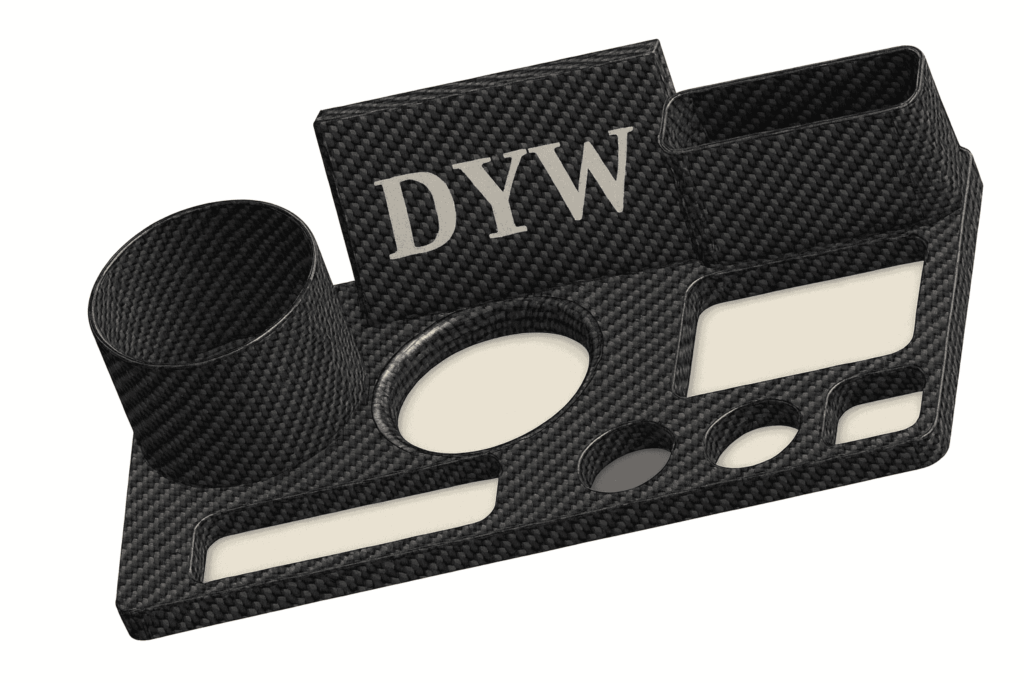
This is an illustration of the final product in the materials that I would like it to be in.
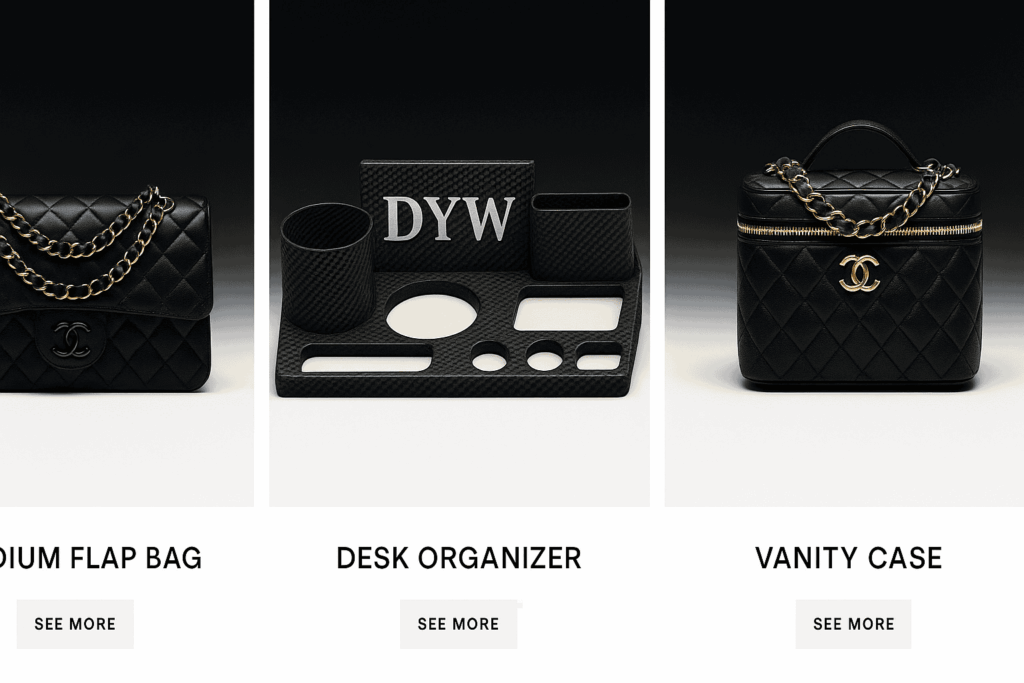
I feel like it is pretty modern looking and it kind of reminds me of Channel.
I would definitely want to print it out and show it off to my friends.
Be Sure to Check Out the New Channel Desk Organizer!
Leave a Reply to jackd Cancel reply