I’m Aiden and let me introduce you to my Robotics assignment in my Fusion 10 program.

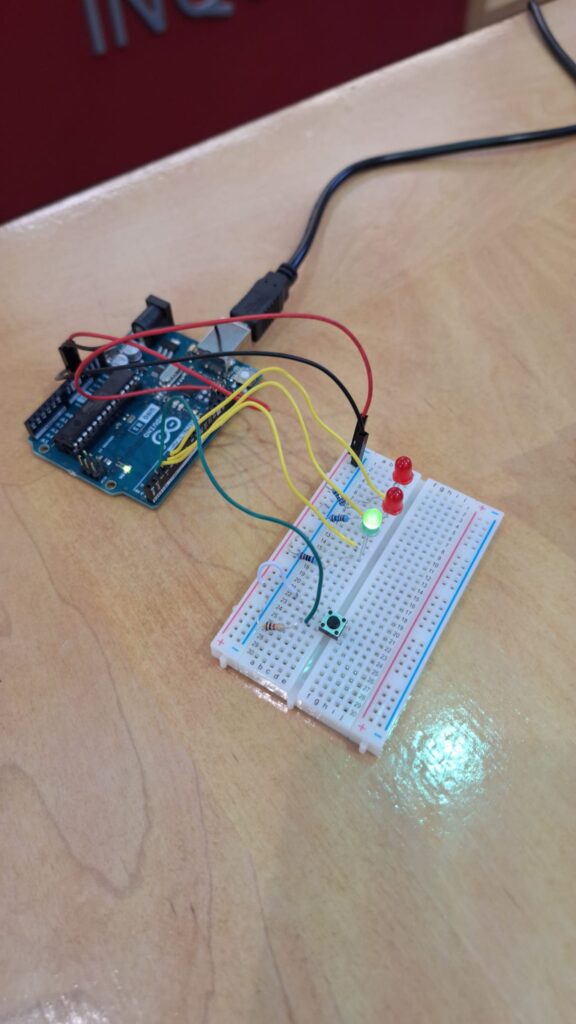
This one is Example 02 from the Starter Kit, Spaceship Interface. It turns on a green LED until the switch is pressed, where it will then blink 2 red LEDs instead.
The code is as follows:
int switchstate = 0;

void setup() {
pinMode(3, OUTPUT);
pinMode(4, OUTPUT);
pinMode(5, OUTPUT);
pinMode(2, INPUT);
}
void loop() {
switchstate = digitalRead(2);
if (switchstate == LOW) {
digitalWrite(3,  HIGH);
digitalWrite(4, LOW);
digitalWrite(5, LOW);
}
else {
digitalWrite(3, LOW);
digitalWrite(4,  LOW);
digitalWrite(5, HIGH);

delay(250);
digitalWrite(4,  HIGH);
digitalWrite(5, LOW);
delay(250);
}
}
The code is pretty simple. The int switchstate = 0; sets the switchstate variable to 0. The void setup() sets the pins on the Arduino Uno microcontroller to their respective input and outputs. The void loop() then sets the switchstate to digitalRead(2), which reads the voltage of the switch, and if (switchstate == LOW) (button not pressed), digitalWrite(3, HIGH) will turn pin 3 on (the green LED) and digitalWrite(4, LOW); digitalWrite(5, LOW) will keep pins 4 and 5 off (the red LEDs). Else, pin 3 turns off and pins 4 and 5 turn on. delay(250); is used to set the interval between the blinks. digitalWrite(4, HIGH); digitalWrite(5, LOW); is the code for the blinking.
This project was really frustrating. It had taken me a long time in this project and I struggled to troubleshoot why the thing didn’t work, even though I was following the book closely. I had originally started with Starter Kit 03: Love-O-Meter, but that failed horribly and wasted a large chunk of my time, so I scrapped it and started a new one.

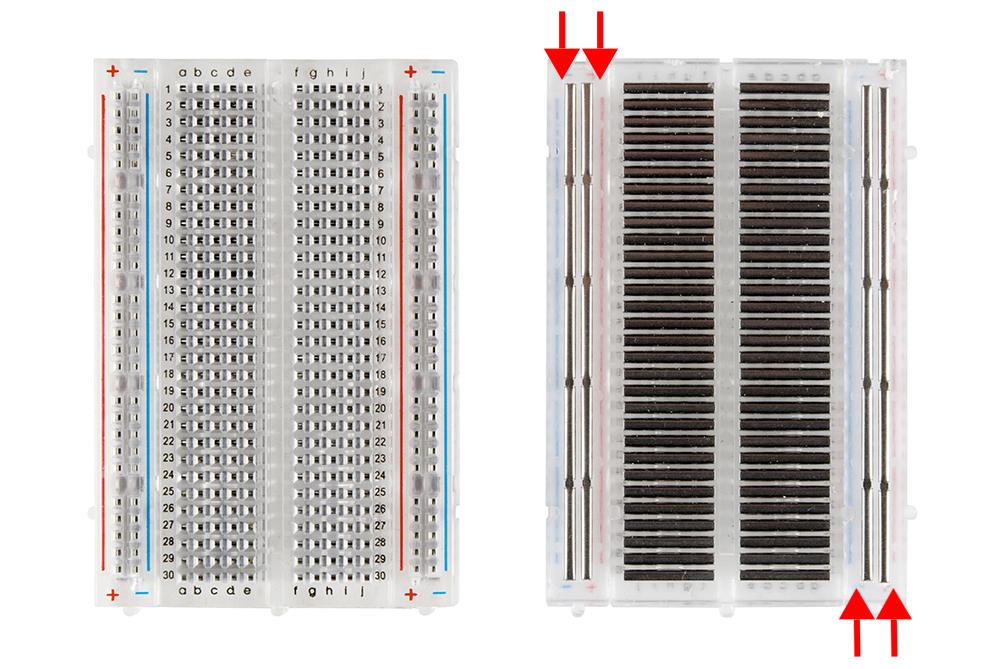
One of the problems I encountered in this project was putting the LEDs on the wrong side of the breadboard. The Arduino breadboard consists of many thin metal lines that lie under the holes. These lines conduct electricity around the circuit. I had put the LEDs on column E instead of F, so the gap could not conduct the electricity and the LEDs did not light up.
This project taught me some basic Arduino robotics and the frustration that comes with it. I felt like pulling my hair out during parts of this project. Now if you’ll excuse me, I’m gonna take a break.
Aiden
3 Responses to “Delving in the World of Robotics – Intro Post 3”
As we discussed in class, Aiden, the frustration of failing often allows us to learn and remember important lessons. What lesson did you learn from this experience that might help you when you build arduino projects (or any electrical circuits) in the future?
i learnt to be more careful with wiring and how an arduino breadboard is split into 2 sections. any electric component that crosses the line will not work.
OK. Thanks, Aiden.