This CAD assignment I was told to design basically anything of choice provided it met the following requirements:
- Sketching(very easy to meet)
- Extruding(also easy)
- Assembly(more annoying)
- Mechanical Drawings
- Bill of Materials(BOM)
Not much came to mind that I wanted to design so I went with a water bottle. It doesn’t have many parts and is visually appealing, and most importantly meets all requirements.
Switching to Onshape
I was limited to ONLY using Onshape for this assignment. Onshape is a web-based CAD software that for me is very finicky to deal with. When it comes to usual CAD design I use the Shapr3D app for iPad. For me it is much more intuitive, much nicer looking and easier to navigate especially compared to the iPad Onshape app. In terms of differences I would say the main few differences are that on Shapr3D it accepts many different input devices(Apple Pencil, touch, keyboard, trackpad, mouse etc.) and it’s much easier to do more conceptual models with less moving parts, and also much easier to quickly make a prototype of something. Using Onshape was a bit of a pain personally because first of all the iPad app isn’t very good and I had to get used very quickly to things like assemblies, mates, etc. and I ended up hopping between the iPad app and the web version throughout designing.
How I Met Requirements
Going back to the requirements for the assignment, I need some form of sketching, extruding, assembly, drawing and a BOM. Sketching and extruding are the more easier ones of the list so I’ll go quickly through how they were done:
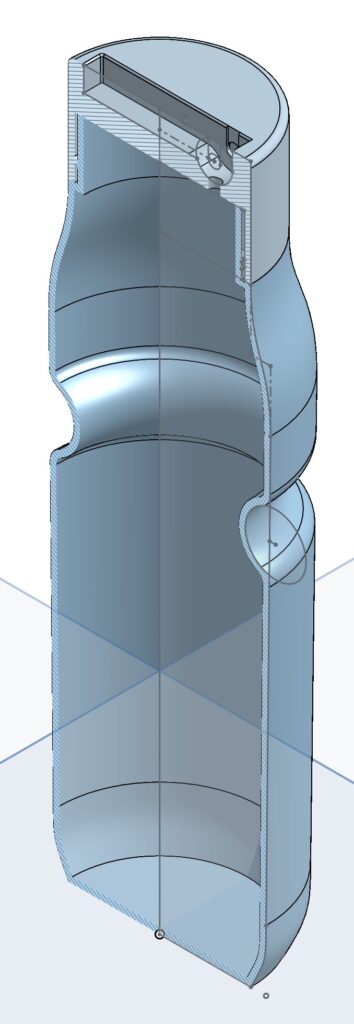
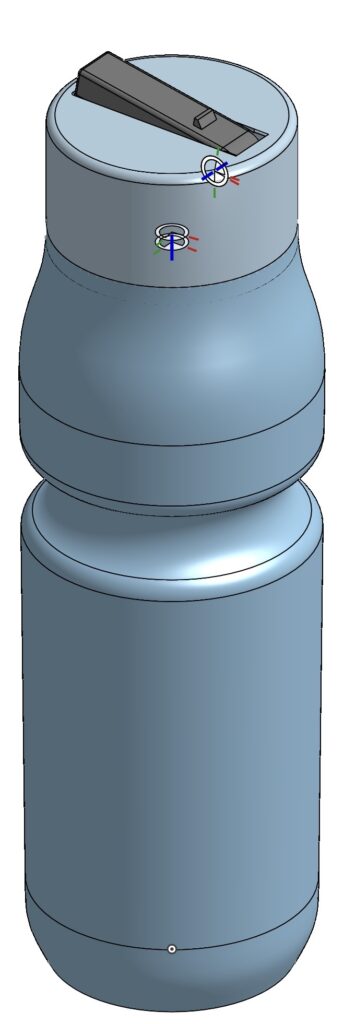
Here is an isometric view of the bottle. How this was made is I first sketched the outside profile of the bottle along with the cap. I then used the Revolve function that creates a circular body based on the sketch, creating the body of the bottle. Next I then used the Shell tool which as the name shows makes a shell of your selected body, so now I have the complete body done which I barely need to touch anymore. Now with the cap it was mostly the same process but I also had to revolve a hole to let the liquid through. Fillets were used throughout the process to smooth out surfaces, creating a more uniform and flush look rather than it being more bumpy. Also if we were to bring this into real life it would not be wise to use sharp edges especially if some sort of metal is used.
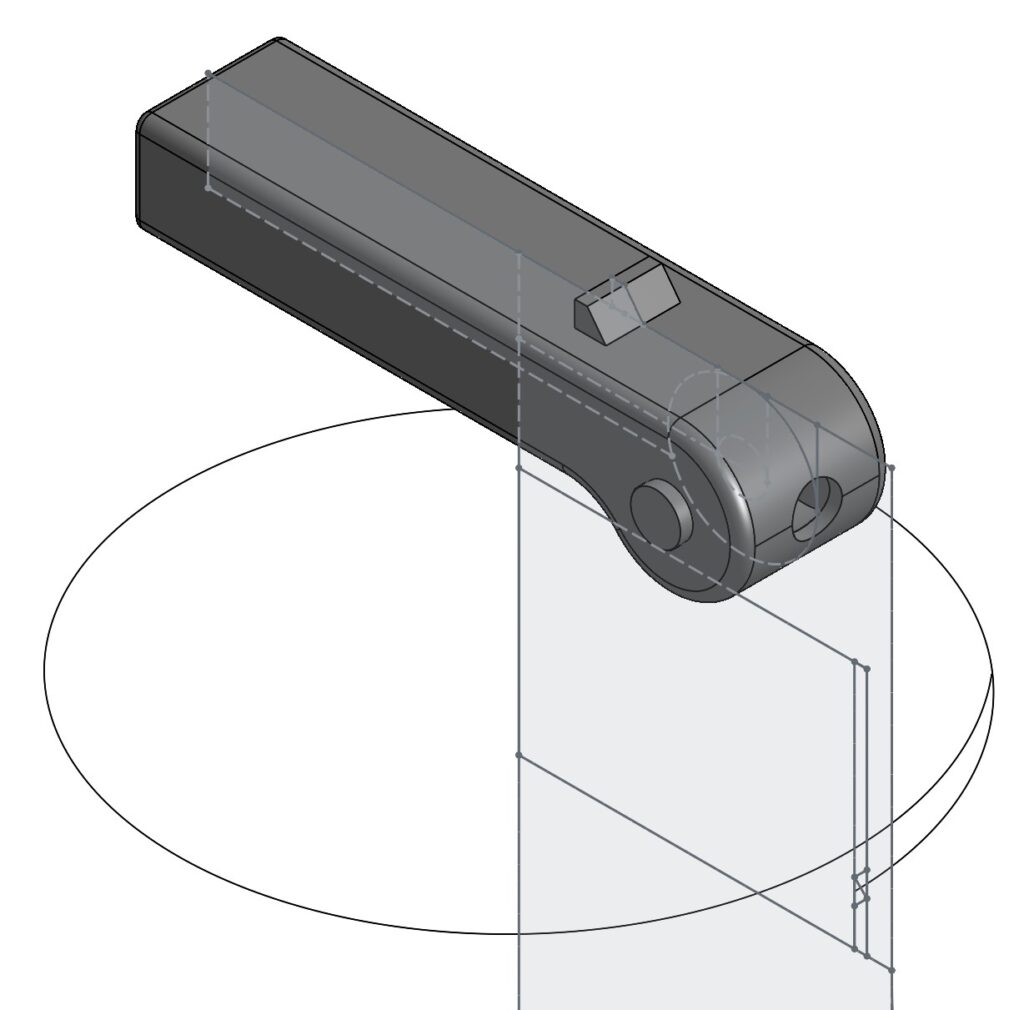
Once again we have an isometric view but now of the straw. I extruded this from the sketch you see hiding in the middle of the straw. I then also extruded the flap that you would use to flip the straw up. I also made a shell of the straw before making any small changes to the body.
Assembly, Drawing and BOM
Attached here is the picture of the entire assembly of the parts. You can see the small circles with the axes tied to them, and these are called mate connectors. What these do is they provide points for you to create axes or freedom of movement in the assembly, where the parts interact with each other. I used 2 types of mates in this design— the Revolute Mate and the Cylindrical Mate. The Revolute mate allows a part to rotate on a certain axis, but keeps the part locked. Meanwhile the Cylindrical mate also lets you rotate on the axis but you can also move up and down along the axis. This is how I will achieve opening and closing the cap.
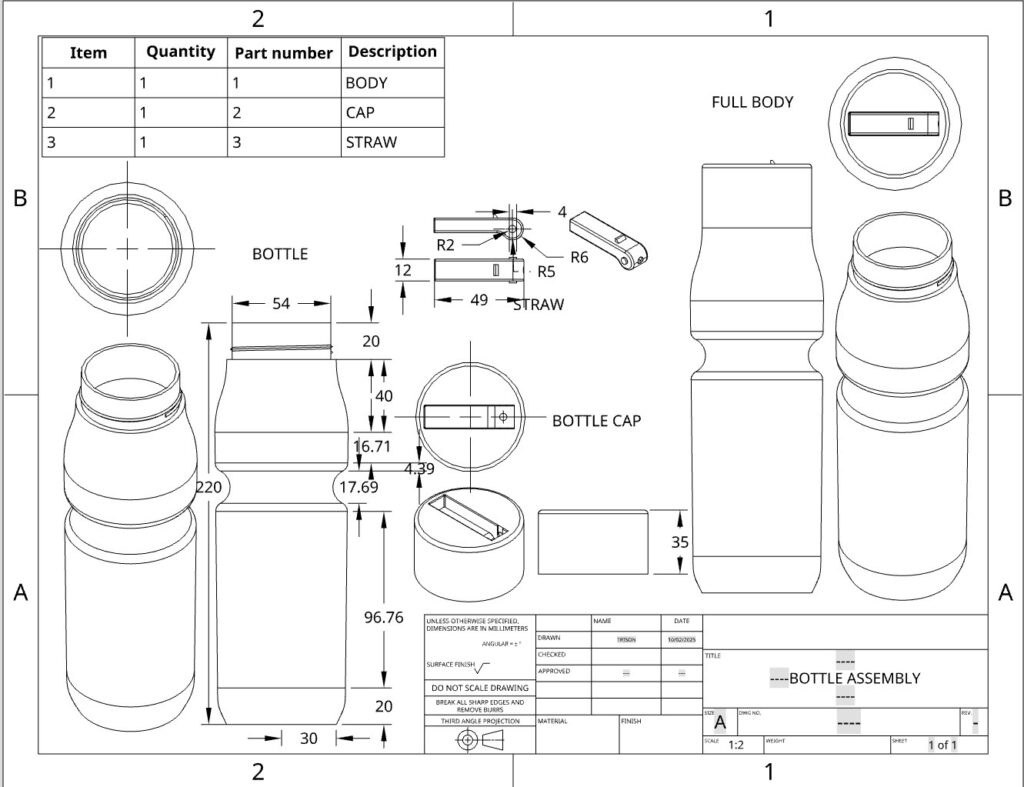
This drawing includes a BOM, dimensions, scale, a front, top and isometric view for each part as well as the whole assembly. With this drawing all requirements are achieved.
Threading
What is threading? Threading is the helical ridges that spiral around the body of something that allows it to be driven into the material by rotation, and convert rotational force into linear force and fastening the two things together. In Shapr3D this isn’t too hard to do; the Revolve function actually lets you move upwards and downwards, making it really easy to create threading. However in Onshape what I had to do is create a Helix using the Helix function and Sweep my thread along the path. This was something I wanted to mention because I didn’t mention it anywhere else inside the post.
Less Important Things
Some other things I wanted to mention was the problems I experienced in Onshape that I didn’t really experience in Shapr3D. One thing that kept happening even on the web version is that when I was editing a sketch suddenly I wouldn’t be able to move around the part studio even if I reset the view, and even though I was able to edit the sketch it didn’t allow me to zoom in which makes things much more difficult. I also had difficulty setting dimensions. What happened was that I would select two points, or a line, or a circle or whatever I wanted to dimension and the current dimension of the part would pop up, but I couldn’t edit it in any way until I left and rejoined the document. This happened mostly in the app version but I remember it happening once or twice on the web version too. Overall I would rather design in Shapr3D but if I really don’t have a choice Onshape does have a wide range of tools that Shapr3D might not have. It also allows for live moving parts which I like, and once I get more accustomed to using the Assembly feature I look forward to using it in my own projects.
Leave a Reply