For my second project of the year, I decided to make a wall stand using Onshape.
I was not too familiar with Onshape when starting this project, only having previous experience from Drafting 8. I knew the basics (sketching, extruding, etc) but really wanted to go beyond what was expected. Unfortunately, I was not able too but aspire to attempt more advanced techniques in upcoming Onshape projects.
How my stand works:
It has a long cylinder-like shape that acts as the stand, with a large, circular platform attached to its bottom. On the platform lay small holes intended for nails to go through. These nails can be attached to walls, allowing the stand to hang coats, jackets, or hanging items in general. They can also not be used at all.
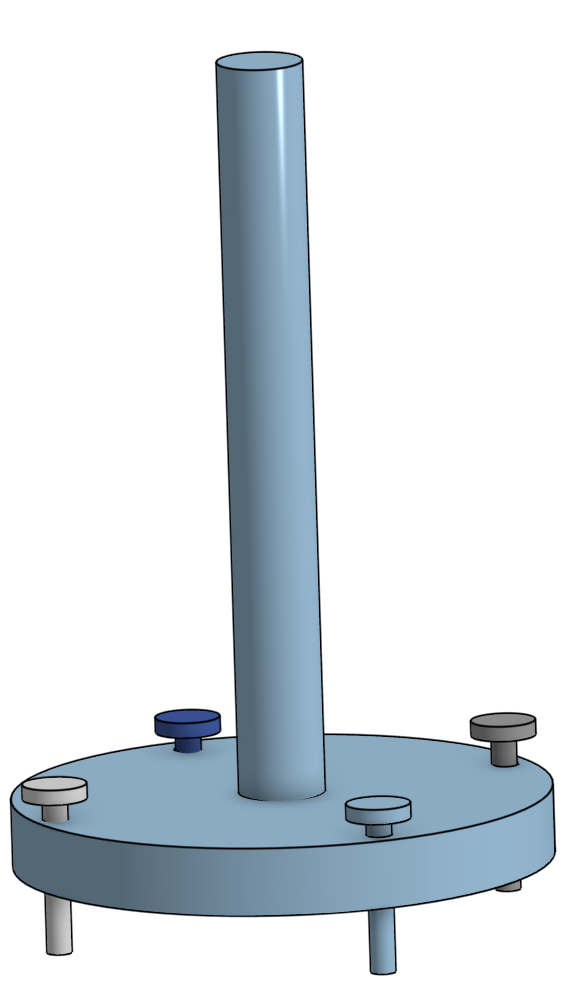
When the nails aren’t used, the stand can stand upright and act almost as a paper towel stand. This allows for a hat or toque stand depending on what the user intends.
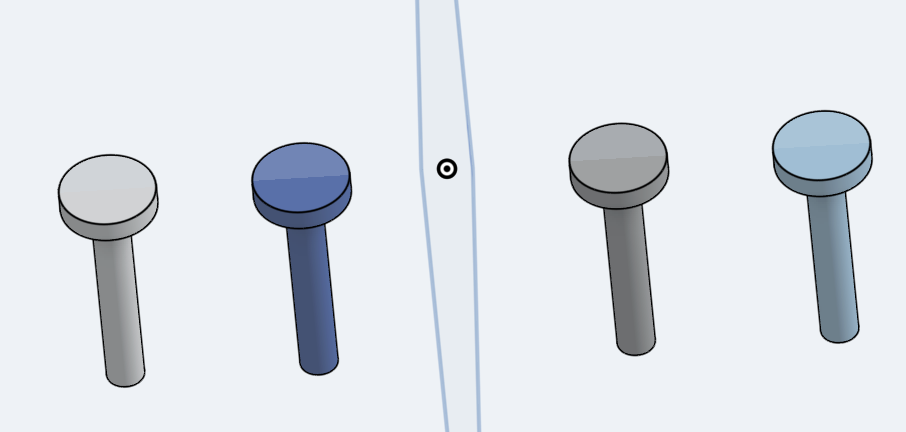
Here are the nails:
Here is a link to my design: https://sgs.onshape.com/documents/b08e609922232746da5570d5/w/7e005fa2d522994d3f7c0e04/e/41c2b8e5bb7bc7c5ec0cdbaf
Abilities I was able to demonstrate
All abilities I was able to demonstrate:
Sketching – drawing a 2 dimensional representation of a face in CAD
Sketching was the easiest part by far. I found that it was very simple drawing shapes and lines on Onshape. I was successfully able to draw and use 2d squares, circles, and rectangles in my project.
Extruding – taking a sketch and turning it into a 3 dimensional object
After sketching, extruding was the next part. This step takes any sketch you may have created into a 3d shape. 2d squares, circles, and rectangles became 3d. This really brought my piece to life.
Assembly – taking multiple 3 dimensional parts and sticking them together
This was the most exciting part. After drawing each piece of the stand individually, I was finally able to assemble all the pieces together, creating the stand I aspired to create since the beginning.
Mechanical Drawings – converting your 3 dimensional parts and/or assembly into a 2 dimensional drawing
This was the most difficult part of the process. As previously mentioned, I wasn’t too experienced with OnShape, so when attempting to mechanical draw each piece, I was skeptical.
I searched up some videos. This was one that helped:
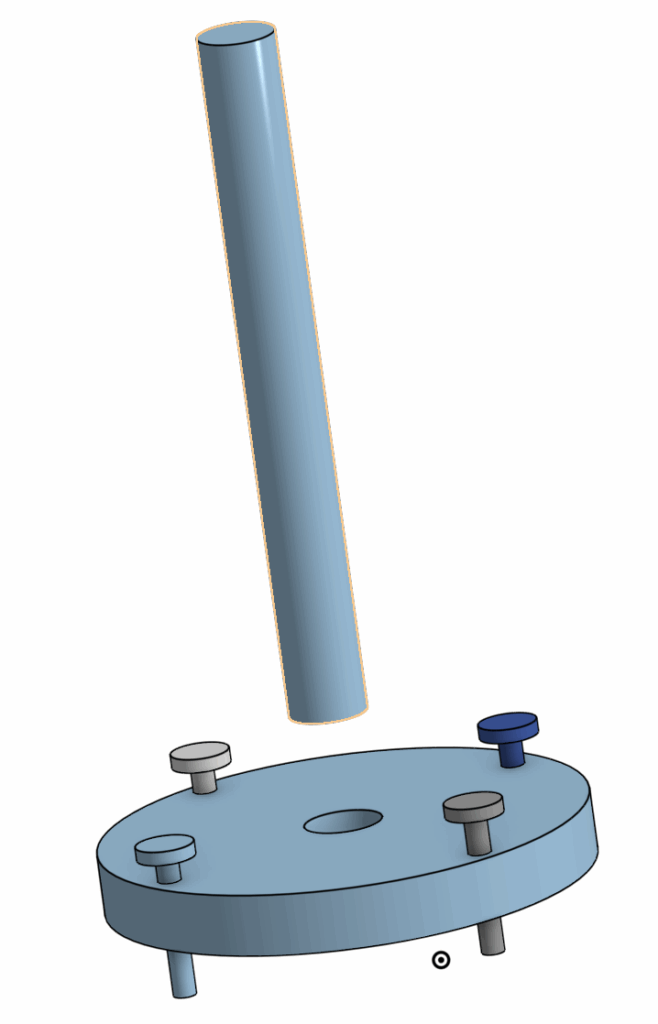
Functioning Mates
In OnShape (and the engineering industry), functioning mates are basically the connections between parts in an assembly that define how they move relative to each other.
In my post, I’ve made great use of this feature, allowing all the nails to be able to move up and down, through the holes of the base. Additionally, the cylinder can move up and down into place on the base.
BOM – Bill of Materials – creating a list of all items required to fabricate an assembled object.
There is a list of all the necessary materials on my OnShape document “Assembly 1 Drawing 1”. However, I will also include it on my post:
- Wooden circular Platform (Diameter) 10″
- Wooden vertical cylinder (Height) 16″
- Nails (7D Nail)
- Hole Cutting Machine (for holes that the nails go through)
Thank you for reading.
Leave a Reply