I decided to make a model of a Pokeball from Pokemon in Onshape as my CAD project, thinking it would be a simple and easy introduction to Onshape. Needless to say, I was very wrong. It took me around 3 classes just to figure out how to make the actual shape of the Pokeball, and even longer to actually finish making it. What’s worse is that after spending all those classes making the pokeball, I realized I made them in the same part studio, meaning I had to redo the entire thing and make all the separate parts again. However, this process was significantly easier as all I had to do was mostly copy what I did previously, with some tweaks. Overall, it was an interesting process, and I was able to learn how to use all the required skills for CAD.
Here is my process for making the pokeball.
Around 75% of the project revolved around this one sketch.

By selecting specific parts of the sketch and revolving it, I was able to create the top shell, bottom shell, and the grey ball in the middle.


Next comes the most annoying and difficult part. In order to create the flat surface in the center of the ball, I needed to make a circle, and extrude it as negative space into the face of the pokeball. I did this by creating a new plane, sketching out a circle, and finding the right extrude length by trial and error.

Finally, I just had to make the button using 2 parts, which was pretty simple, and was accomplished by extruding 2 circles.

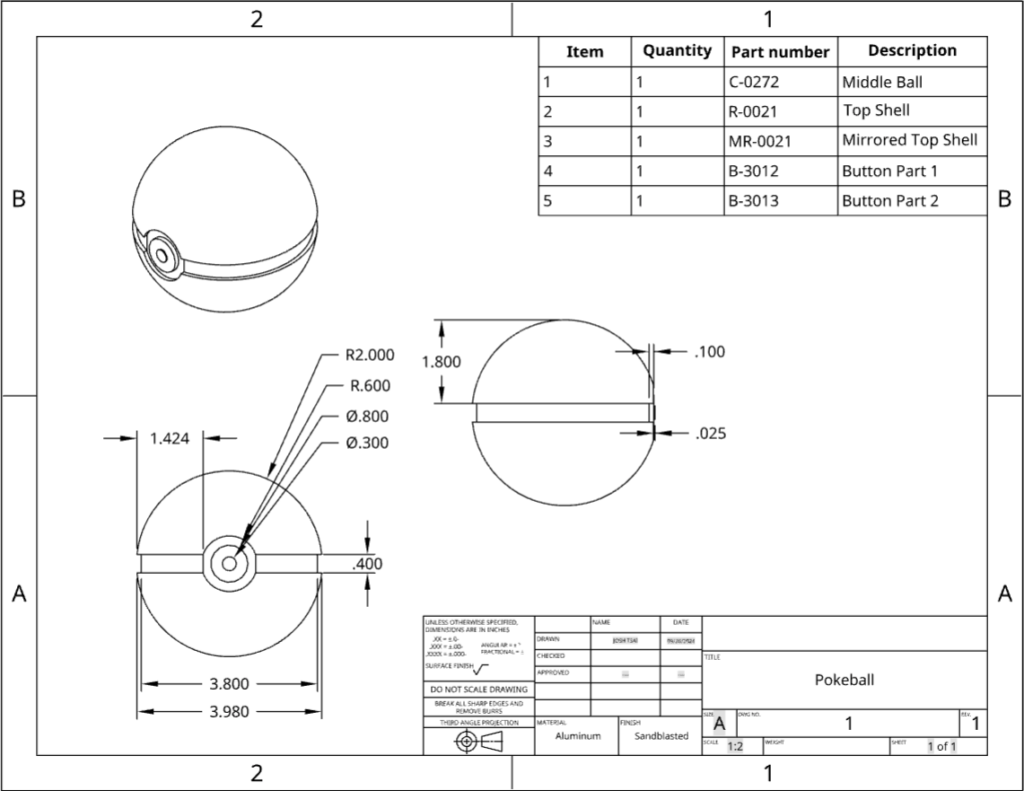
Here’s the mechanical drawing I created for this project. It consists of the important measurements, as well as a bill of materials.

Edit: Screenshot of assembly with mates.

Leave a Reply