This post is my final blog post for the Fusion 10 Cohort Program. In this post I will be showing you my product, SleepPlugs©.

To retrace our steps, let’s go over what our original problem was.
Our problem:
Earplugs lack features; sleep earbuds are not cheap
Foam and silicone earplugs that can be bought in bulk are cheap, easy to get, comfortable for some but may cause irritation due to their low quality and lack extra features. On the other hand, sleep earbuds on the market are quite expensive ($30~$200), may be uncomfortable for side sleepers, can be used as normal earbuds during the day, and usually have active noise cancelling or play music.
Constraint and Scope
For the product, I’m aiming for people who have trouble sleeping in loud environments as well as people who have trouble waking up to their alarm. IT should be cost-effective, affordable, and simplistic. It will prioritize sound cancellation, comfort, and cost.
For this project, however, I’m more constrained by time and skill, so I’ve decided to focus on the electronics and coding side of things, as this is a STEM course. The time frame for my project is 3 months and I am limited to using fairly large Arduino boards and foam earplugs for the prototype.
As I mentioned, this project’s aim is to maximize sound cancelling, comfort and cost, so I think success would be defined as how noise-cancelling it is (decibels reduced), how comfortable it is (ergonomics and irritation), and how cost-effective I can make it (simplicity of parts).
Design Solution
With that out of the way, let me show you a couple of my original design solutions and the one I eventually chose as my final design.
I was originally going to design an actual pair of silicone earplugs with small electronics that were going to have active noise cancelling at a certain range and would allow really loud noises i.e. alarm clock ringing, to go through. This product was really redundant and I didn’t really need the selective active noise cancelling, as earplugs already block out sound, and I could actually integrate the alarm into the earbud. I also realized I didn’t actually have to make the thing true to size – I just needed to showcase the circuit.
So after some deliberation and further research, I ended up with my current design, a pair of wired foam earplugs with vibration motors embedded in them connected to an Arduino Uno and a HC-05 Bluetooth module. The entire board was originally going to be just an ESP32 microcontroller, as it combined the both in a super small package, but the driver just didn’t download, so I scrapped it.
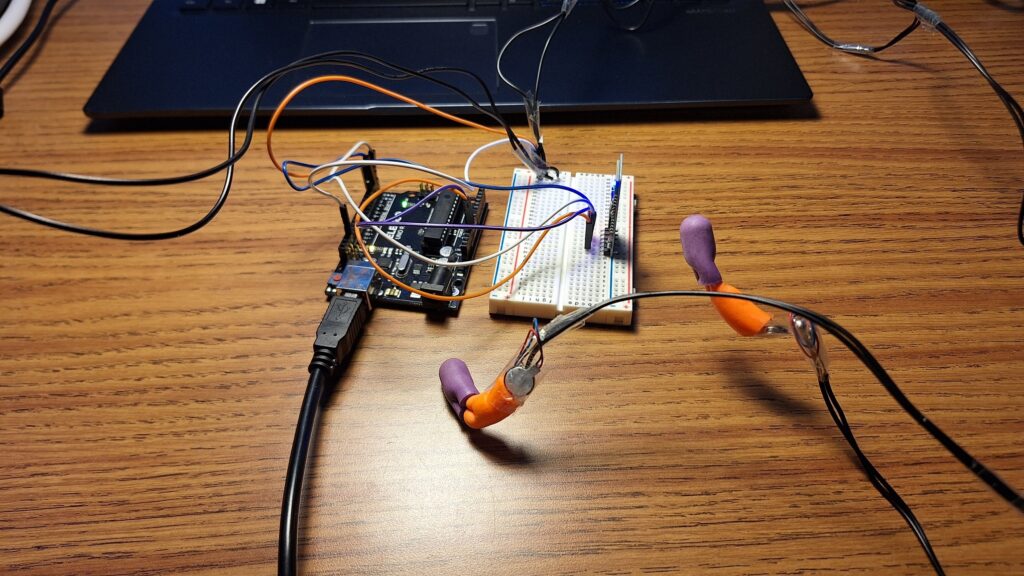
The prototype – the Arduino Uno, breadboard, HC-05 (on the right), and the two earplugs
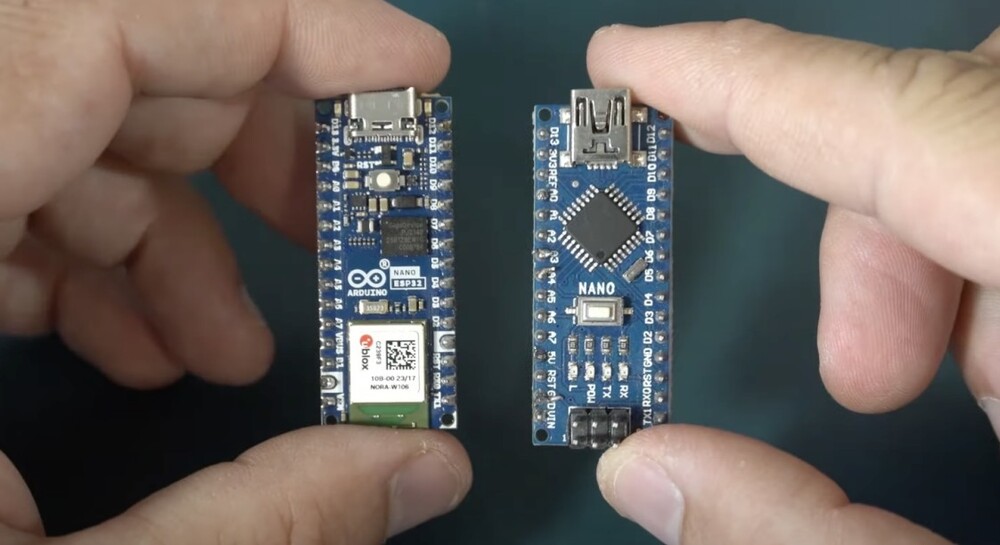
An ESP32 in comparison to a human hand, much smaller than an Arduino Uno, a breadboard, and a HC-05 all together.
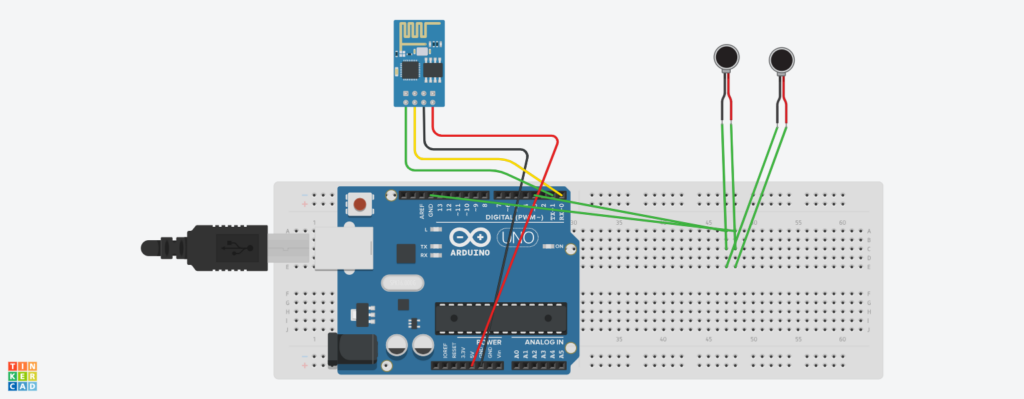
The circuit diagram of the prototype.
To control the alarm, I also changed my original plan of having an Arduino RTC and an LED display on the breadboard itself to controlling it via a mobile app. The mobile app has a simple design with a Bluetooth devices list, a button to pick your time, a button to set the alarm, and a button to turn it off.

A screenshot of the app I built with MIT App Inventor.
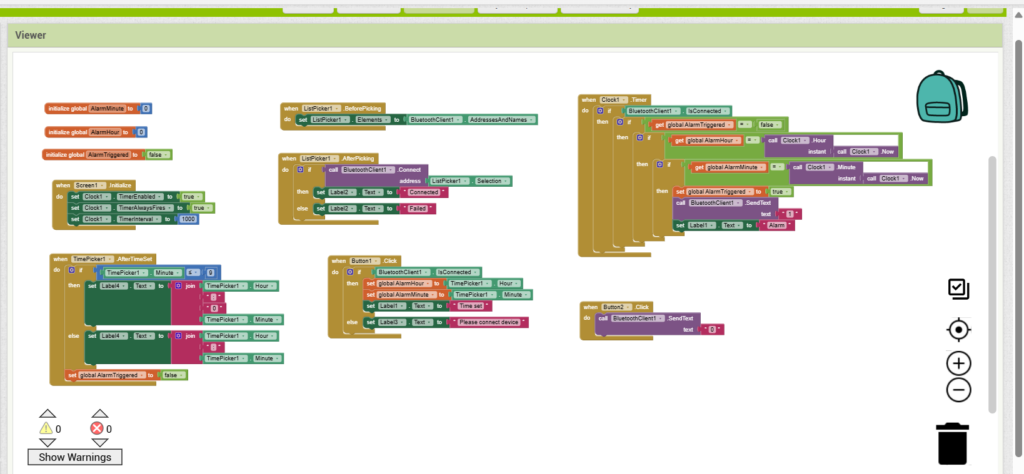
Code of the app in MIT App Inventor.
Project Planning
I planned out my project using Notion. Using it I outlined the steps that I needed to build the prototype, from preliminary research to gathering the materials. I set some deadlines for myself for the prototype, although I didn’t really follow them that well. I planned to start building the prototype in April, but it was delayed until May. I had also changed my plans midway while debating if I should use the ESP32 and looking for prebuilt Arduino controller apps. I had to rush a little to finish the Arduino and app as I didn’t expect them to take that long.
I needed to learn about how to use the HC-05 module during the project. It was kind of complicated and inconsistent but I got it to work. I had to also learn how to use MIT App Inventor’s Alarm and TimePicker. I’ve had experience with App Inventor and it was easy to use, it was just kind of counterintuitive with its logic.
BOM and Costs
For my project, I needed:
- 1 Arduino Uno
- 1 HC-05 Bluetooth Module
- 1 breadboard
- 6 jumper wires
- 2 vibration motors
- 4 long wires
- 4 foam earplugs
I borrowed many of the electronics from the school. For the components I had to buy, it cost $50.54 altogether, although I didn’t use all of them. With this in mind, I should’ve used around $18.29, without counting the electronics I borrowed. If I did, it would be around $54.72, which is slightly expensive but also inaccurate as it includes an Arduino Uno, an HC-05 and vibration motors which I may not use in the final product. However, this is still cheap compared to current sleep earbuds and I believe this makes it more affordable to the public.
Testing and Validation
My project was hard to test as while I could test it based on my own perspective and others’, I couldn’t test how many decibels the earplugs actually reduced, and I was unable to test the alarm as I didn’t have my phone in the boarding house, which I needed. However, I have tested the alarm when I wasn’t sleeping and it worked perfectly.
It was really difficult to test my prototype as while I demonstrated the alarm and Arduino, I couldn’t test anything else as I didn’t have them. I didn’t have a silicone earplug and I hadn’t come up with a design yet. To test the prototypes would be inaccurate and doesn’t reflect the actual product. However, I believe that my design would work well as silicone earplugs already exist on the market and are proven to be quite effective.
Code of Ethics
For my project, I don’t believe there is much ethical implications as my SleepPlugs are very simple and only help with sleeping.
Conclusion
This project has made me delve deep into coding, Arduino, and the rabbit hole of sleep earbuds. I also learnt that project management was important in a project as it keeps everything on the right track. Now I’ll be using my SleepPlugs and getting a good night’s sleep. See you next time.
Aiden, FUSION MKIX
int motorPin = 3;
char c;

void setup() {
  // put your setup code here, to run once:
  pinMode(motorPin, OUTPUT);
  Serial.begin(9600);
}

void loop() {
  // put your main code here, to run repeatedly:
  if(Serial.available()){
    c = Serial.read();
  }
  if (c == '1'){
    digitalWrite(motorPin, HIGH);
  }else if (c == '0'){
    digitalWrite(motorPin, LOW);
  }
}
Code for the Arduino
One response to “End Of The Year – Personal Project Finale – Fusion Final Project Pt. 3”
Thank you for your report, Aiden. I feel like you could have pushed harder here and accomplished more, but I hope that the project has intruiged you enough that you either continue it or that it has inspired you to look at something new.